Showing posts with label Dog. Show all posts

Sunday, July 30, 2017

Newest Addition

It has been a while since the last post, but I have a pretty good excuse... I have been EXHAUSTED!


Eva is getting a new sibling!


Sunday, January 22, 2017

Week 2: Kitchen Finished!

How often can you really say that your kitchen glistens? For a brief period of time, mine did!

Following the 14 Week Home Organization Challenge (Kitchen Week), everything has been cleaned. For some reason they think you can deep clean your kitchen in a week, which is nonsense. Last year it was my first time doing this and it took me four weeks! I am giving myself a break and allowing two weeks for the big tasks... like the kitchen.

It all started with the cabinets: they were emptied, vacuumed, wiped, waxed, "stuff" culled, and then re-stocked. That alone took a solid week for 40 cabinets!

To the left you can see my "cooking station" so I have everything in reach when cooking/baking.

To the right is just a lot of miscellany. I have a little bit of room here where I might move some of my homemade canned goods to.

I still have one cabinet that is too full, but it has the small appliances we need but don't use terribly often.

Next was backsplash, counters, sink, small appliances (microwave, stand mixer, etc.), stove, dishwasher (make sure you clean the filters!), fridge/freezer (inside and out), baseboards, and floors.
I found it helpful to work in a "top-down" approach, that I learned from my mom. (Thanks Mom!)

See that glass paned cupboard on the right? That contains teacups from previous generations of women in my family.

The top one is from my paternal Great Grandma circa 1910's? The middle is from my paternal Grandma's collection, and the bottom from my maternal Nana's collection. I have space for three more on the other side of the sink and I am hoping to have Mom and MIL each pick out a set that "represent" them, to add to my collection.

In case you are wondering, here are some of my favorite cleaning products that I use:


Don't be too envious of the kitchen... this week I am to tackle the pantry and kitchen nook. Yeesh.


But first, what's needed after two tough weeks of cleaning the kitchen? Puppy snuggles! I love how much she loves her dad.


You may remember that Mom is also doing the challenge with me!! This is her first time doing it, so everything is going to take a lot longer. Perseverance is tough, but needed. Go Mom and Dad!

Here are some of the results of their hard work. Looking good!


Tuesday, January 17, 2017

Week 1: Kitchen

I promised to try and keep this updated with my progress on the 14 Week Home Organization Challenge

Well the first week is the kitchen and while some people can get it done in one week, but since Dear Husband (DH) and I both work full time, I planned on taking 2 weeks. Since this is my second year, I have less to sort through so it should take us less than the 4 week it did last year.
This first week it mostly looks like this: a disaster


From all angles...
We have 40 cabinet drawers or doors. 40! It is amazing, until you have to clean them. Since we didn't have enough room to take everything out at the same time, we started with kitchen tool and gadgets.
After pulling all the things out, we wiped down the cabinets with Murphy's Oil Soap, then waxed them with Feed-N-Wax like last year. We then culled any items we don't really need, and put everything else back.
Then we repeated the process for the tableware (plates, glasses, silverware, etc.), then for pots and pans, and eventually spices and food staples (flour, sugar, etc.)

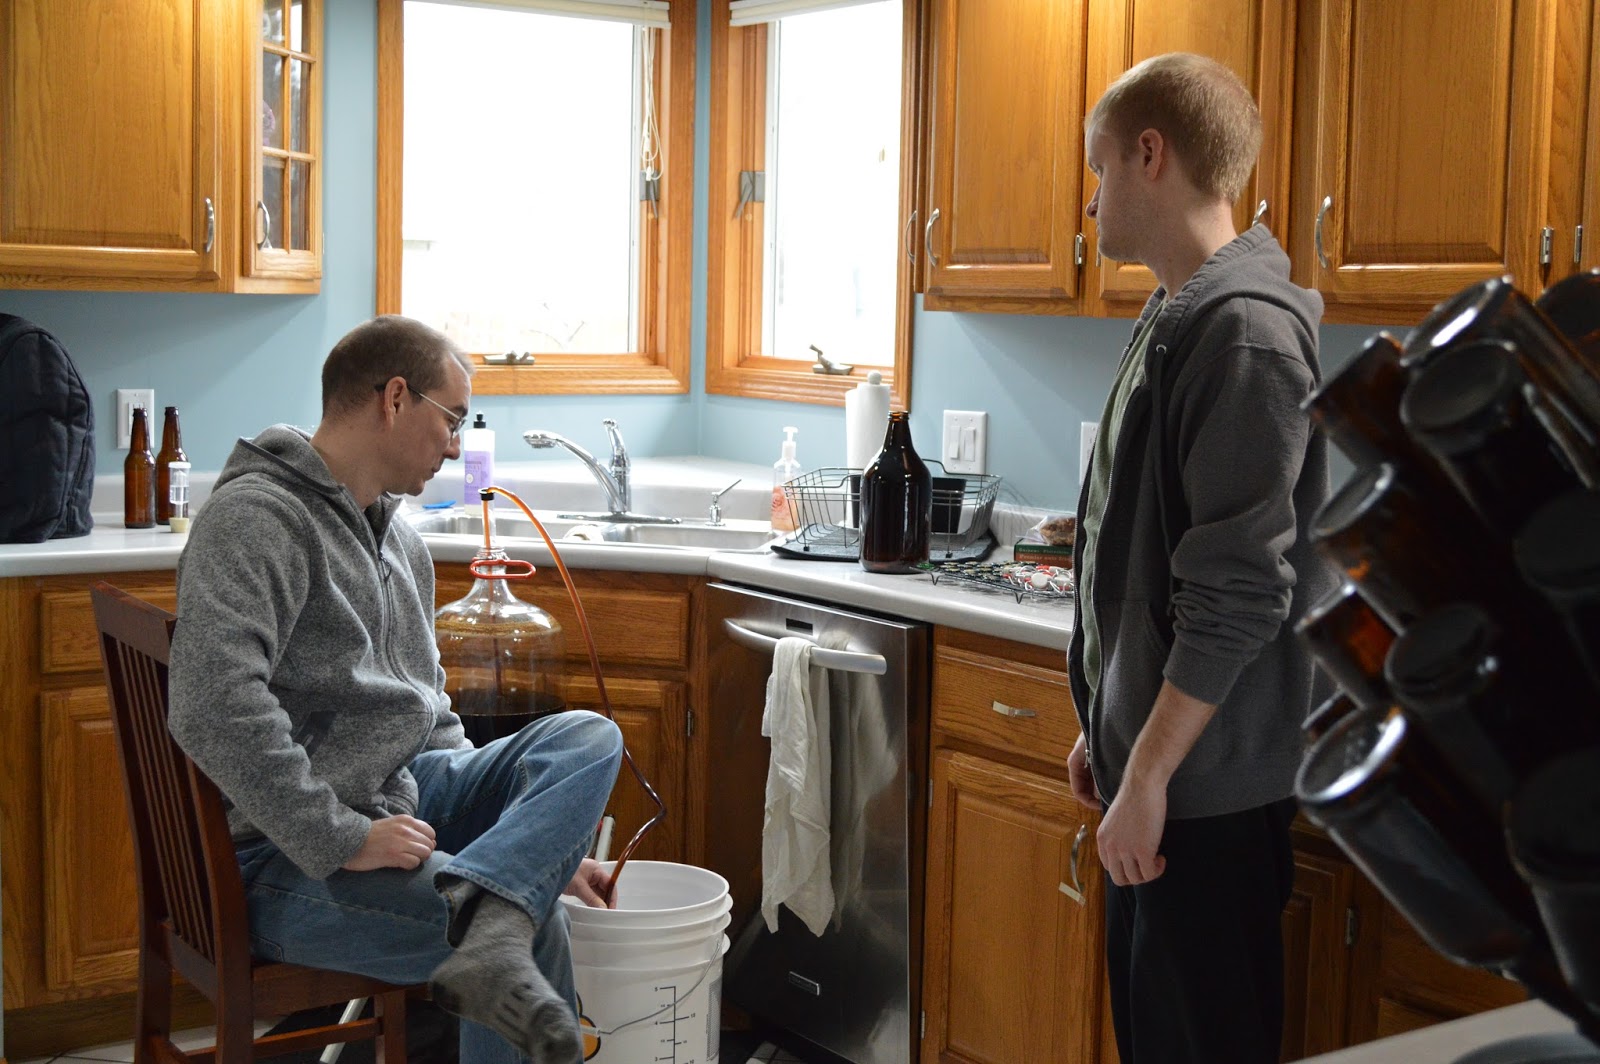
Thankfully we were able to take a small break this weekend when we had SisX and her husband, BroD, over.
DH needed to bottle his latest batch of beer, so BroD helped with that while SisX and I worked on other projects.


And what's the best treat after a successful day of projects?
A stout float using home brewed beer!


Oh, and Eva was not to be outdone... her project was destroying a felted wool ball she got for Christmas.


Sunday, January 8, 2017

2016 Christmas

We had a great, relaxing Christmas season:
We visited with friends and family, watch movies, read, nap, ate WAY too much good food. There were a couple of short illnesses to deal with but plenty of sleep, homemade soup/stew, and fluids got us back on our feet in short order. 
Among all this excitement, I didn't take any pictures. Not a single one. I can't believe it. 
It was just such a nice, chill vacation that we spent our time enjoying it rather than trying to document everything. 

Here was the Christmas card we sent out: 
The only time I had was during a Packer game, so I decided to embrace the theme and convinced Dear Husband (DH) to step out into the snow during time-outs and commercial breaks until we got a good picture. 

I did a bit better with my diet over Christmas (+1 lb) than over Thanksgiving (+3 lb), but it still leaves me three pounds over my "stable" weight that I want to maintain. I think what helped is keeping up with calorie counting over the holiday, so now I just need to keep making smart choices and not binge on leftover candy!

We did have a little Christmas cocktail party, and the Christmas Mocha Rum Punch was amazing. SisX and I dug the recipe out of Mom's 1970's TriDelta sorority cookbook. Those ladies sure know how to party.

The big decoration we added this year was a fake Christmas tree. We still had our normal (4 ft) real tree with sentimental ornaments on it, but we wanted something bolder for the front window since we don't have outside lights yet. 

DH has very strong opinions about needing a live Christmas tree in the house for the holiday, and I couldn't agree more. There is just something about the smell and look that makes the mess completely worth it.

I found a pre-lit one on sale, and it came in just 4 easy pieces and needed to be "fluffed" out to look more real. I picked up some ribbon and silver+blue ornaments (some plastic and some glass), but I couldn't find a topper I liked, so I just made a giant bow out of the ribbon and stuck it on top. 

I like how some of the ends are "feathered" or frayed so there are more color tones and looks fuller. 

The other complicated decoration I do every year is the Santas on the mantle. Every year my Nana would send an an ornament from a Hallmark Keepsake series.

When she passed, I was in the middle of the "Father Christmas" ornament series, so I have continued to buy the new one each year. I feared last year was the end because there were 12 of them, but the 13th did come out this year.

Yes, the stocking on the right is Eva's with her latest Rally-O and Agility ribbons she earned in December. 


Here is the latest addition to the collection from this year.


The first week of January is usually time for me to set up my "system" for the year. I am trying out this new "Commit 30" planner this year, where you write goals and objectives and make shorter, actionable steps to those goals each month, week, or day. 

One of my goals is to continue getting the house in order. You may remember that I tried the 14 Week Organizational Challenge last year. Not only do you clean, but you cull everything you can, room by room. Well I made it through week 8-10 last year but couldn't quite finish. Since I work full-time and only have the evenings available, this year I am giving myself more time for each task (so it is really the 23 week challenge for me.) 
I have also recruited Mom to be my accountability partner! She will be trying the challenge for the first time ever (so proud of her!), and we are going to encourage each other to keep up and finish the challenge. Oh, and I'm ignoring the basement because that cull and clean will take the rest of the year!

Wish me luck! I will try to log a little bit about each room. Besides, keeping busy will be good for me right now; I am like a sulky preschooler because my best friend is moving away. Why is it so hard making close friends as an adult?

Sunday, October 9, 2016

Camping and Running!

Dear Husband (DH) and I are pretty new when it comes to camping. Both of us camped a little bit with our families when we were young, but nothing since our ages have had two digits.

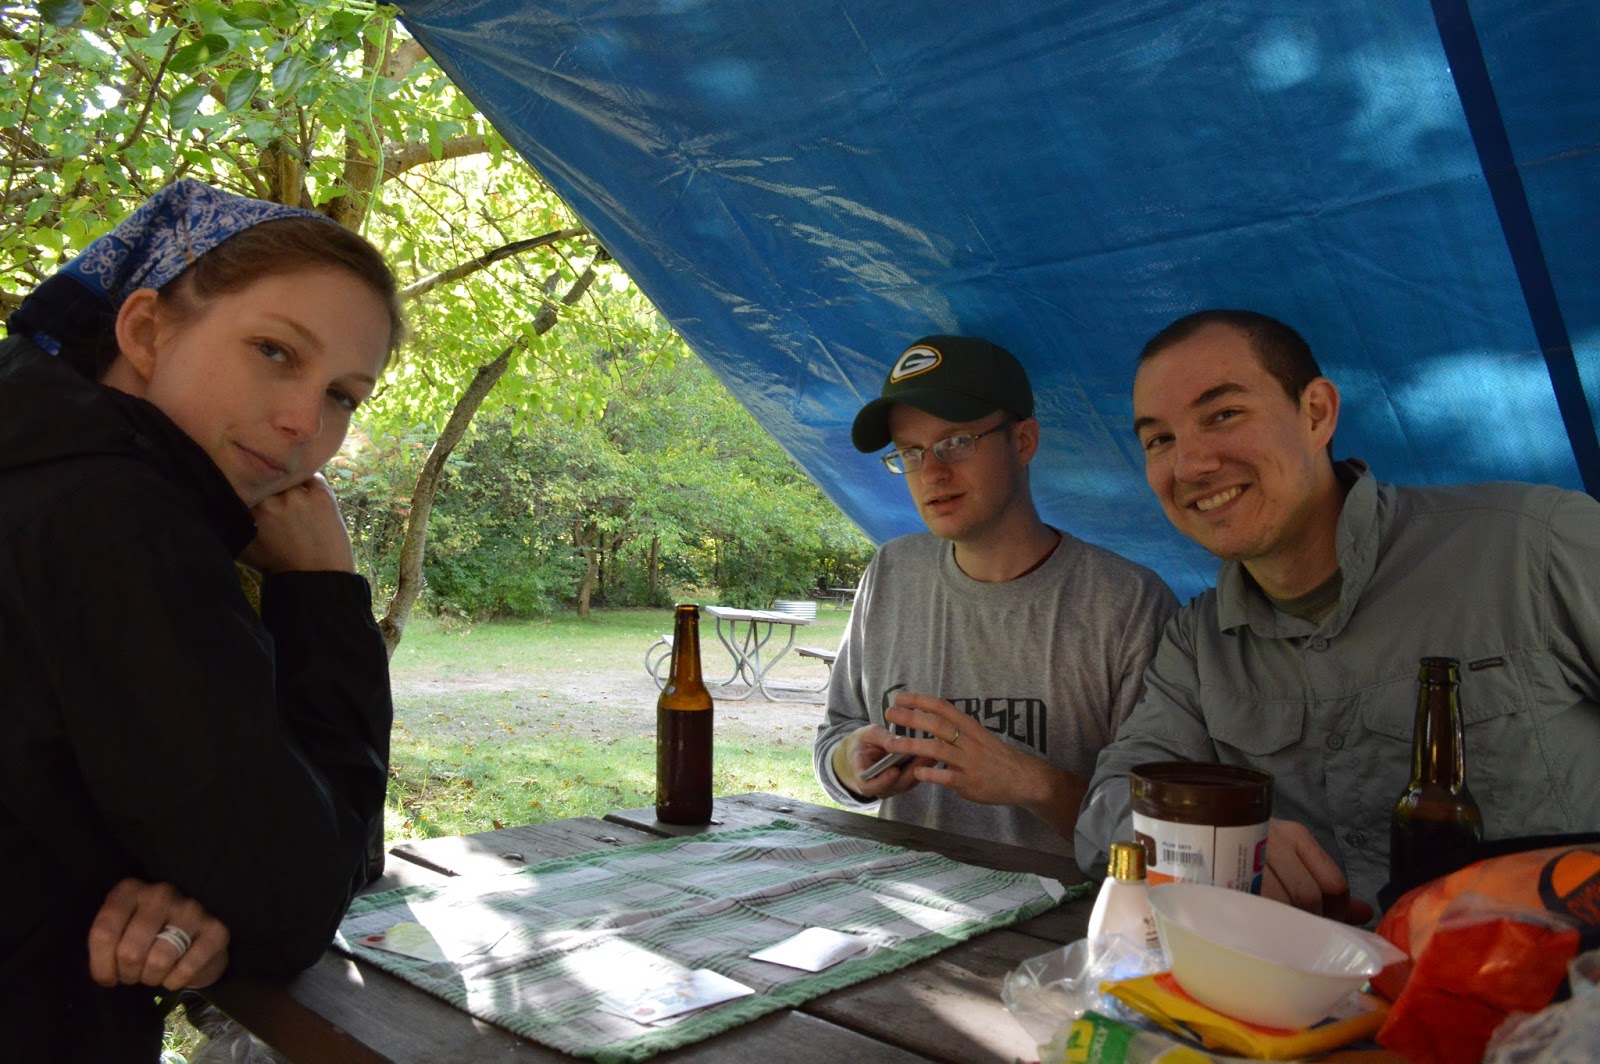
Thankfully, SisX and BroD have more recent experience and indulged us in a two-night camping trip last weekend to help show us the ropes.

We had such a nice little campsite-home for a couple days, but I wasn't able to get too many photos due to all the rain and drizzle during our stay.

I caught a few of us soaking in the sunshine while it was out and about. The boys were tossing around a football, while Eva lounged in the warming sand.


It was cold enough at night that Eva crawled into my sleeping bag and slept by my legs all night, but thanks to her we both stayed nice and cozy. It was quite a challenge getting Eva in the tent while trying to keep the sand out, but we managed well enough.

 We did get the chance to take a long hike over the dunes but due to the rain, the majority of our day time was spent huddling under our tarps, playing cards, and cooking amazing camping food.

How is it that all food tastes better when you have been camping? Not only did we have the traditional S'mores, SisX materialized breakfast "banana boats" which are bananas with peanut butter and chocolate chips, roasted in tin foil over the fire. It was a great, filling breakfast for a day of adventuring.


Of course one of the first things I did when we got back was bathe Eva right after unpacking the car. Naturally the very next day she found something nasty to roll in and earned herself a second bath in as many days... she didn't seem too remorseful. She was more interested in getting out so she could try to rub in the foul stench again.


We had those big adventures last weekend, but this weekend was also exciting; DH ran in his first 5K ever and rocked it!

There were over 500 people registered, and he had a lot of factors that could have messed with his time. He had never run with so many people before, he's not used to "trail running" compared to road running, he doesn't usually run outside when it is cool, and he had sprained a leg muscle a few weeks ago and hadn't run that distance in a while.


All that being said, he did AMAZING, beat his time goal, and finished in the top 10 for his age group!

I am so proud of him for going after it and completing this goal he has had for almost a year.
Way to go!


Sunday, February 21, 2016

Spring Cleaning the Pantry (and more)

In my last blog post I talked about how setting aside a whole week for Spring Cleaning is impractical for a full-time working couple. I also mentioned that I am following along with A Bowl Full of Lemons 14 week organizing challenge.

Each week you are supposed to tackle a different area of the house. Well the very first room, the kitchen, took me four weeks to complete. I'm going to make the excuse that it is the toughest room!
Well I finally got to move on the the next area... the pantry. I didn't move far, but at least this one was a small space.

Well, I thought it was a small space, but look below to see how much stuff fits in there! This is after I threw out the 5-6 expired items. Because of the small pantry and only two people in the house, I can usually keep tabs on what is in the pantry and toss old items.

Figures that as soon as I got the kitchen cleared and cleaned, it gets all cluttered with pantry goods. You can see I did have my little helper, Eva, as always. However, her time was split between checking on me and snoozing in the sun spots.


The thing that has always bothered me with this pantry is the instability of the shelves.  Only two little plastic clips are holding each shelf in the back. Too many cans on one shelf and it would start to "bow" and become bouncy. Every time I placed a home-canned jam or sauce on the shelf, my insides would cringe as I envisioned the shelf falling, glass shattering, and all my hard work and love splattering over the tile floor.


 No more! While permanent shelves would be nice, I like being able to "see through" the shelves so I can see everything in the back. So using scrap wood I had on hand, I build shelf supports and screwed them into the studs on the back wall of the pantry. While the shelves still bend a bit under a heavy load, they are more stable, and my heart doesn't flutter every time I stack apple butter.

It was pretty easy. I just measured and cut the wood to length, used a studfinder to mark where screws should go, pre-drilled holes and screwed the boards in place.

The funny thing? I painted some screws white so they would blend in a bit better. However, when I was installing them I found that longer screws worked better on the ends. Well, after that photo was taken I did a short-cut cheat. *Shh don't tell!*

To hide the gray screws, I actually used white-out to "paint" them so they would blend in better! Normally that is a bad idea because it won't match perfectly, but you really don't see these screws much, and I didn't want to spray paint them and ruin the wall paint. Silly, I know but sometimes it works.

I also added yellow plastic place-mats to two if the shelves. They really help to keep the cans from tipping over.

It still looks a bit cluttered, but most of that is due to the leftover chips from our Superbowl party. Dear Husband (DH) told me I was buying way too many chips but I wasn't convinced. Needless to say, he was right.

Now, week three (dining room) and week four (launch pad) were pretty easy for me so I was able to clear and clean them more quickly.

Our dining room is on the half of the house we don't use as much. I still had a large pile of items for donation that I culled out of the kitchen, so I really only had to put things away where they belonged
I still need to paint and put up curtains, but I am STILL working on removing the wallpaper paste. (Worst. Project. Ever.)

The "launch pad" is the area where you drop all your stuff when you enter your house. Some people have a mud room, others just have a few hooks on the wall. In our case we have two areas; one by the garage door for us, and one by the front door visitors.

This was was a closet I converted into a mini mudroom and the first space I redecorated when we moved in. Removing the bi-fold door made it much easier to use, but it is still very difficult to photograph due to the tight space. To the right is the view when you walk in from the garage. Coats, shoes, and mail goes there.

On the other inside wall you can see where we hang our keys and sunglasses.
I also see a peek-a-boo puppy who is spying on me!


Here is the one by the front door where guests can hang up their coats and sit down to take off their shoes. (Don't mind the ladder, that is for removing wallpaper paste. Ugh.)


Sunday, January 10, 2016

Fixing the Fireplace and First Place Finishes

It's that time of the year when you want to cuddle down in front of a toasty fire with a warm mug of cocoa. Mmmm.
But first things first. Fires can always be dangerous, and I strongly urge you to get your chimney cleaned and inspected if you can't remember when it was last done. It usually only costs $80-$100 if there aren't any complications or repairs. That is much less expensive than having your house burn down!

The first company we hired I wasn't terribly impressed with, but they did say we could convert our crumbly, broken fake logs to a real wood burning fireplace if we just switch out the gas burner.

In this instance I am much happier being safe than sorry, so I willingly hired another company for my own peace of mind. The second set of guys were much better (actually inspecting the chimney with a camera) and confirmed that we could burn wood.

He also said "If your husband is handy, he can install the new burner himself." I informed him that I was actually the handy one in these types of projects. *sigh* Gender stereotypes: still happening everyday.

The existing gas line was a pan of sorts (see above), that had large flames come out the pipe and extending through the fake logs. The new one has more focused flames that you only light to start the real logs aflame, then turn off once the wood is burning on it's own.

Disclaimer: Do NOT do this on your own if you are not completely comfortable and thoroughly understand what you are doing.

I did my research and took all appropriate precautions. Thankfully Mom was there to help me because the toughest part was trying to get the old pan out!

The existing pipe actually had the wrong type of sealing tape (white is used for water lines) so I bought some yellow which is specifically for gas lines. This is wrapped on any threaded connections.

 The actual assembly went pretty smooth after that.

We made sure to check all the gas seals with soapy water. When turning on the gas, if there was a leak it would have created bubbles with the soapy water. Then we would have had to shut the gas off right away and tighten the connection.

The instructions say to make sure the flames are pointing down and toward the back. This prevents ash from falling in the holes, or the gas blowing hot ash out toward you.


Eva wanted to help out too and offered encouragement even though my hands were all dirty.

She may be great at supporting DIY projects, but she also did great a few weekends ago when we competed in another Rally Obedience trial.

We participated in two trials, and she took first place in both! (It helps that she was the only dog in her class, so as long as we qualified, we got first.)
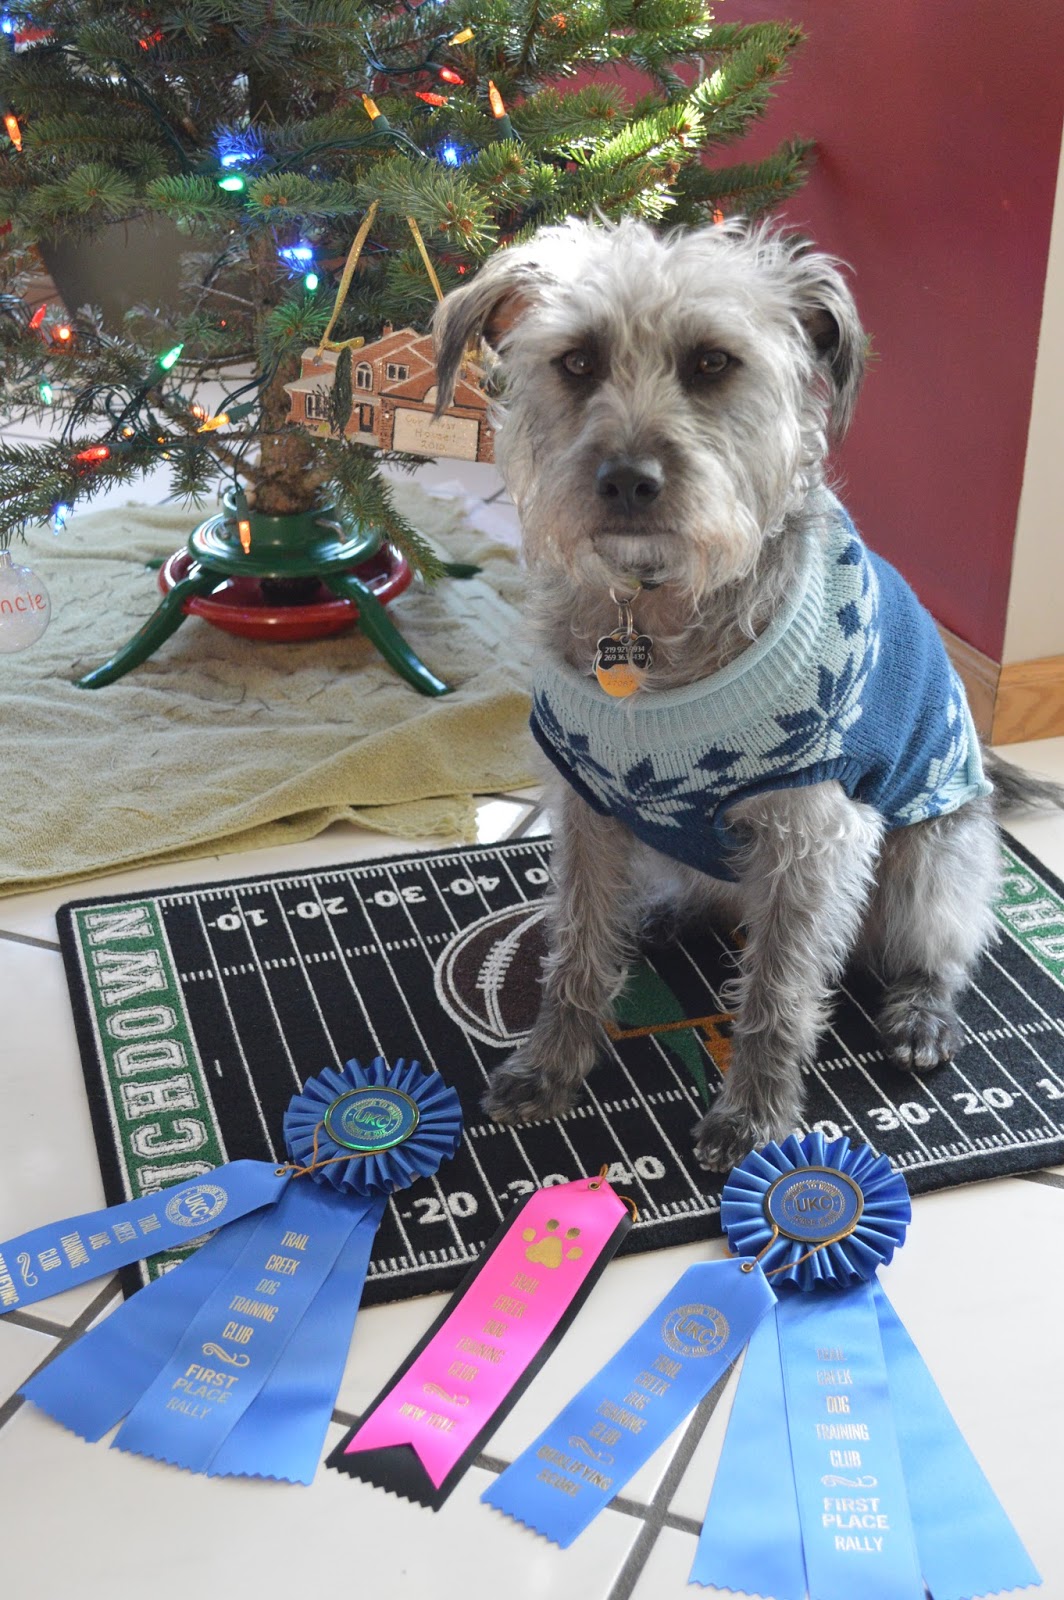
 She also moved up a class level, which is the middle ribbon. We moved from level 1 (beginner on-leash) to level 2 (intermediate off-leash.)

She wasn't too thrilled to have to sit and "stay" when there were interesting ribbons to smell and inspect.