Wednesday, January 29, 2014

The Project List

Christmas seems like forever ago, but I have still been working on getting the house straightened up and cleaned! There are so many projects and activities that I want to accomplish, sometimes the house becomes a disaster zone.
So I am going to try something... a list.
I know, I know... I have lists all over the place for different things, in various stages of completion. A list is nothing new. 
But this list is going to be different: It is going to have rules.

1. Only project related tasks
This will prevent me from putting routine to-do's on the list which just end up clogging it up. Not allowed on the list include: clean bathrooms, stop at bank, fold laundry, water plants, plan menu, etc.  These items have to get done anyway, and can go on a short-term "to-do" list.

2. Projects are listed in order of priority
It doesn't matter if the project is big or small, expensive or free... pretending that we have unlimited time and budget, the projects will be listed in the order that they would ideally get done. Some projects may have a "due date" like a birthday, holiday, or gardening season. Put these higher on the list, in order of their due-date.

3. Projects will be worked from the top of the list, down
(Starting with the highest priority.)


4. If unable to work on the "top" project, work on the next one down.
Some reasons you might be unable to work on a project: need materials (put on shopping list), not enough consecutive time, need to save up $, etc. Please note that the inability to make a decision (color, size, shape, etc.) is NOT a reason to work on the next project!

5. Re-ordering the project list is (almost) never allowed.
Exceptions include: adding a new item (which will be inserted in the appropriate order), or an approaching deadline (i.e. must plant bulbs before winter, want to make something before a party or holiday... etc.)

First I wrote out the whole list of projects I have flying around in my head, and put each item on a punched out tag. (This is the first punch I have ever bought and I love it already!)

Then I cut up some foam-core board I had lying around, and covered it with some black felt that was also hanging out. I would have loved a prettier fabric, but didn't have any scraps large enough. I used Elmer's spray adhesive which worked miracles!

Creating some labels (which I taped to the felt), I began to put some of the projects in order.
I quickly realized I had WAY too many, so I created a "Don't even worry about it" category. These are projects that are much farther down the line. I turned them to face the board so I wouldn't even think about them. As I complete projects, they go under the "Complete!" label and I will replace it with another from the "Don't even worry about it" category.

We will have to see how well this system works, but I am going to give it a shot!


Wednesday, January 15, 2014

Closet Case (Part 3)

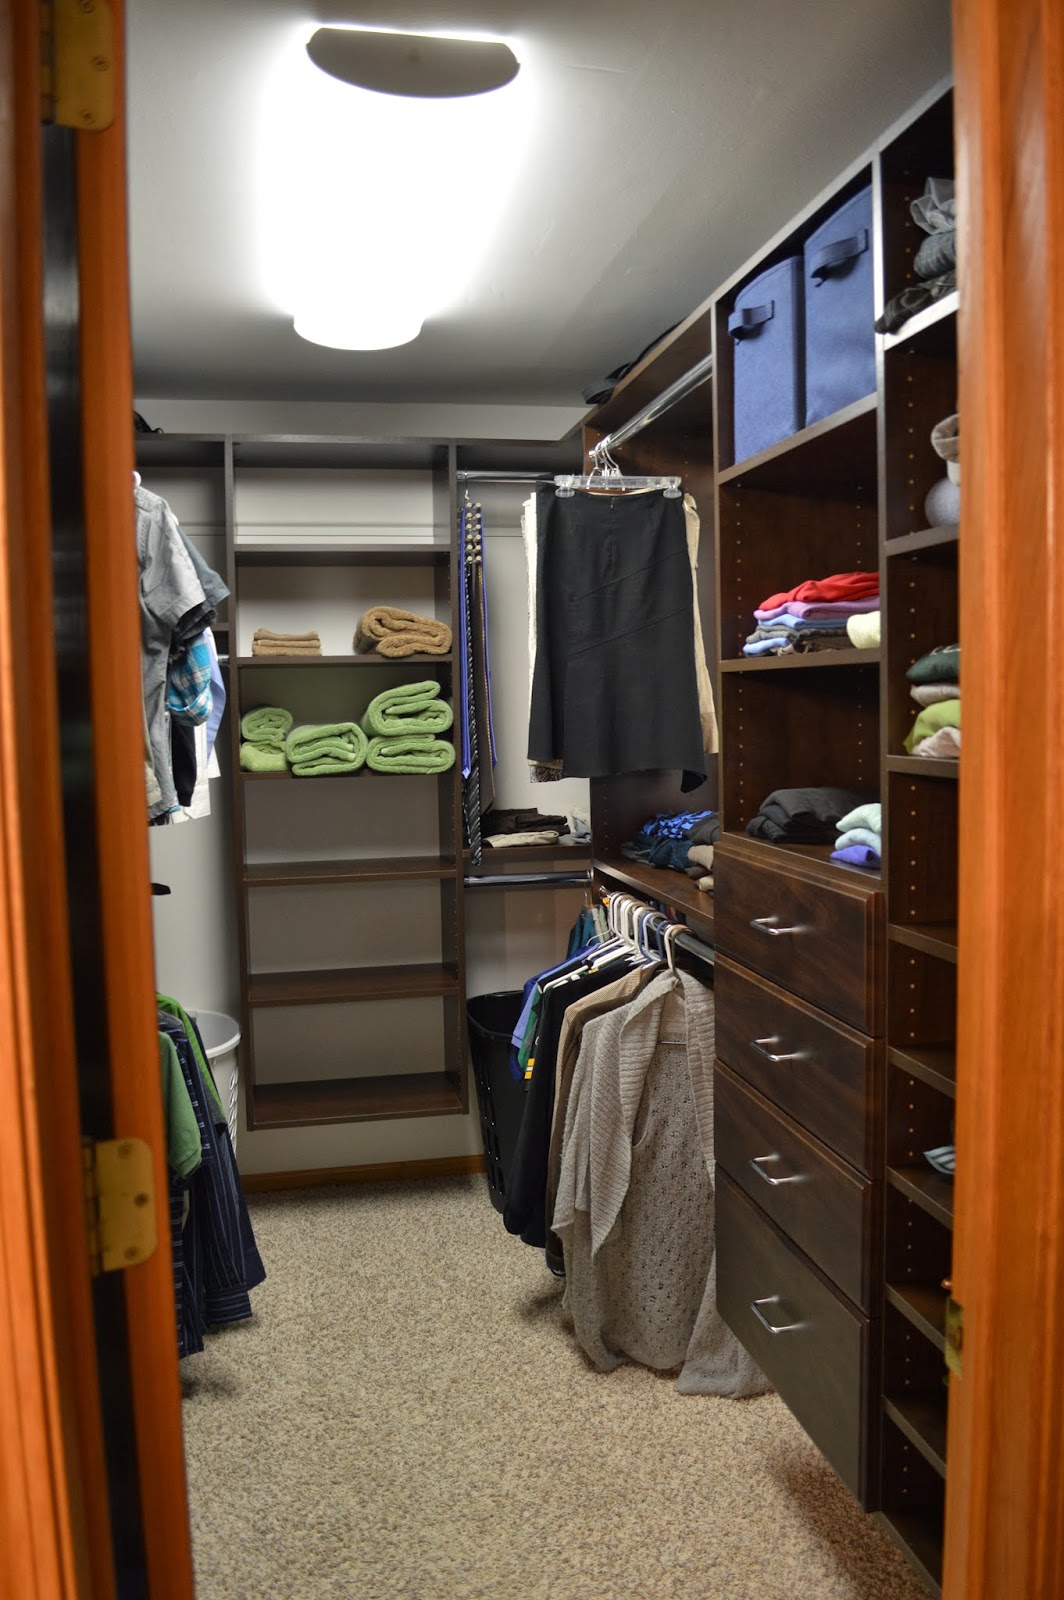
We were finally able to resume our closet project! Everything had been primed and the ceiling was painted, so all that was left was to paint the walls, install the light, and put up the shelves.
Our last day of vacation just happened to be the perfect day because we were already stuck inside due to a winter storm. With over two feet of snow, we stayed in and painted away.

And DH (Dear Husband) shoveled the driveway with some help from Eva!


The next day, we were able to take down all the tape and tarps to reveal our blank canvas of a closet. Time to finally install the new light! The old one worked, but didn't have a cover. Don't worry, it will be donated so it can be used again. Why stick with florescent? It is harsher lighting, but it gives a lot of light with little to no heat. This is important in a small space like a closet.

The light said it can be installed in 30 minutes.... maybe only if you are a contractor and have already put in 20 of them. Between trying to find the right breaker to shut off, very confusing instructions, and the crooked way it mounts to the ceiling, it took us about 2 hours. Here is DH putting the cover over the wires he just hooked up. (Look how handy he is!)
Ta-Dah! A working light, whoo hoo!

The next part is to install all the shelving we bought 4+ months ago that has been sitting in our bedroom. (Sorry, honey!)
We celebrated by opening up the first box with the instructions in it... then I saw the gallon-size baggie full of just screws, and I got a little overwhelmed.

Once we actually got started, it really went pretty easily. We completed the back wall first so that we could use it as a learning curve for the other two! First the metal tracks get put up on the walls, then the vertical panels get hung on those. The horizontal shelves help to secure things together.

Thankfully we didn't screw anything up too bad on the back wall, so we were able to move on to the side walls!


Each of the sides are mirror images of each other, which turns out to be a lot of shelves. After 5 hours of assembly, we were finally able to celebrate! But then we had to move all our clothes back in...

THEN we could admire our hard work.


Whew! It was tough work for Eva keeping an eye on us!


Friday, January 10, 2014

More Christmas gifts

Snowstorm of the century! All across the Midwest we have had terrible winter storms for the past couple weeks.

For us this included at least two feet of snow, and windchill temperatures dropping into the -30's, and snowed in for two full days.  Cold like none other! Here are a few pictures to show I am not completely making this up:


 See that gray fence in the back? That is a full 6-foot tall fence! The snow drift was up to Dear Husband's waist!
Because the temperature dropped so low, the side door inside of the garage started to frost over.

Dear Husband (DH) and I went a little overboard for Christmas this year, but we budgeted for it. We bought a Nikon DSLR camera for me (hence the nicer looking photos in the blog), and his Christmas/Birthday present was a new full-size piano!
Before, he was playing on a  keyboard that didn't even have enough keys. Have I mentioned how AMAZING he is at playing the piano? I guess if you actually practice and take lessons for 12 years that is what you get... but I am still amazed that he can just "pick up" Chopin or Gershwin. Crazy!
With his skills he deserves a real piano, and it is wonderful to hear music through the house.

One of the other gifts I made for our home-made Christmas was candle-teacups. My little sister, SisV, saw them on Pinterest and requested them. I didn't get a chance to take pictures of all the different steps, but the next time I pour candles I will make sure to document it.

Tuesday, January 7, 2014

Bunny Bench

I don't own a rabbit. I've never "played with" a rabbit.
I don't really know what they like or don't like, so I had to do my research.
Since we were doing a "homemade Christmas" for the people in our family, I made presents for the pets too since pets are family!
Dear Husband (DH) wasn't too thrilled with my improvised building space (see right), but I can't very well build out in the snow!

Using scrap material from other projects, (making sure they were safe for bunnies first) I was able to build this "bunny bench" for just the cost of the toys attached to it. I got the idea here, but I have no idea if Super Joe, the receiving rabbit, will like it or not. 
I did do my research to make sure what I built was safe for Super Joe.
I used untreated pine (left over from my garden trellis), Elmer's non-toxic white glue, sisal rope, and 3 hanging toys specifically for rabbits.

It is approximately a foot by a foot and a half, and 10 inches tall. After cutting all the pieces, I sanded them all down as we don't want bunny splinters.
I assembled it with nails and a few screws. While I did sink the nails and screws down, BroD (the owner) will need to check and monitor to make sure none come loose or stick out.
Then I drilled some holes all the way around to hang the rope and toys for Super Jo to play with.

(It is not your imagination or camera perspective... it is very crooked due to warped scrap wood.)

BroD, sent pictures and Super Jo likes playing with it! He took to it right away.


Sunday, January 5, 2014

Adult Tu-tu

I actually made this in November, but I couldn't reveal it until now because it was a Christmas gift for my sister, SisX. Our family did a home-made Christmas this year, where all gifts exchanged were hand made by the gifter.

I really should have taken pictures as I went, but honestly... I was scared and didn't know if it was going to work! I am a very amateur sewer and hadn't made anything in a very long time. What made things worse, is that I was trying to combine two different patterns.

Here is the inspiration for the adult tu-tu. But the DIY for that skirt had a zipper. Dunn-dunn-dun! (Cue scary music.) While I probably could have muddled through it, the biggest problem was that I didn't know my sister's exact measurements. All I knew is that she is a bit taller and a bit thinner than me. (Life's really not fair... I've gotten over it.)
 

So, I wanted to use the elastic waist pattern I found here. Please note that it says "20 minute skirt," but because I am picky, OCD, scared, a newbie... chose tricky fabric (slippery satin and poofy tulle,) it took me 4 or 5 days to complete.

I used the 20-mintue-skirt pattern for the satin lining. Yes, working with satin, especially for a newbie, is very tricky but it was just the lining so it didn't have to be perfect. I still had to go over the seam 3 times before I was sure it would hold.

Then I used the circle-skirt pattern from the "inspiration tu-tu" for the outside floofy-ness.
I put the lining inside the tu-tu, and sewed them together along the top with very long stitches. This enabled me to gather (scrunch together) the fabric.

Then I pinned it evenly around to the elastic waistband, which was made roughly to the right size. I sewed them together with zig-zag stitches so that it could still stretch. If you used straight stitches, the thread wouldn't let it expand. 

Oh, then after I finished I found this... which is almost exactly the same thing I did, oy!

At least it turned out pretty good, and it actually fit SisX! Yay elastic!

Such a great model!