Monday, October 27, 2014

Wallpaper Gods

Like everyone from this decade, I hate wallpaper. There, I said it.
Thankfully our house came with very few papered walls when we bought it, but I am just now getting around to removing them.

Our kitchen and master bathroom have wallpaper boarders around the top of the walls, and our formal living/dining room had two "accent" walls with textured wallpaper. (See right.) Since we don't use our formal living/dining space very much I decided to start there.

I was super lucky... either this was really quality wallpaper (in it's day), or the wallpaper gods were in my favor. It peeled off so much easier than I expected! 

First, you want to pull off just the top "face" of the wallpaper. Let me explain...
You know how you try to pull off a price tag sticker, and just the top layer peels off, leaving the glue and a fuzzy layer of paper? Exactly like that: you actually WANT the glue and fuzzy later to stay on the wall and just peel the facing off.

I tried to get a picture of the face, then the glue/fuzzy layer that I am pinching, and the wall behind.

If you try to peel off the glue/fuzzy layer while it is dry, it will take some of the drywall with it. (See picture to the right.)

Yeah, I learned that one the hard way.
As much as you want to pick at it, just leave it alone!


So carefully peeling just the top layer off, I was expecting just small bits to tear off, but because this wallpaper was so thick and textured, it came off in one entire sheet! Starting at the bottom, I oh so carefully peeled the top surface from the glue/fuzzy layer, slowly peeling all the way to the ceiling. I couldn't believe it came off all in one sheet! (I only wish I had a picture!)

I tried to take pictures showing one strip (floor to ceiling) removed, but it is tough to see in photos with that light.


So that left me with a fuzzy wall... now what?

Well, as seen before, you can't peel at it while it is dry, so you need to wet it down.

First tape-off your baseboards and protect the carpet with plastic. This is a must, because water will be dripping down the walls.

After some searching online, numerous posts suggested adding fabric softener to hot water and spraying the mixture on the wall. 
I don't use fabric softener, so I bought the cheapest big bottle I could find. 
In a spray bottle I filled about 1/4 to 1/3 with fabric softener and the rest with hot water, but I soon found out that I didn't need that much fabric softener. I ended up using about half of what is shown in the picture.

So, with my hot water / fabric softener spray in hand, I tested it out on a small patch of the fuzzy wall. I sprayed it on liberally (hence the plastic on the floor) and waited. I waited about 5-10 minutes. The darker, bottom part of the wall is the wet part, soaking in and softening the glue.

Once again, I expected to have to scrape, scrape, scrape little bits off the wall. I even got my steam mop out to see if that would help along with the soaking.


But again, the wallpaper gods were with me! The glue/fuzzy layer also came right off in sheets!
I got so excited, and Dear Husband (DH) had no clue why I was so ecstatic. Even after I explained, I don't think he appreciated the enormity of my discovery/luck.

He was kind enough to get a picture of me testing out the wet glue layer. (Can we stop a minute and appreciate how good my hair looks in that picture!? I NEVER have good hair days! Thank you DH for capturing it on film!)

Here are the walls with all the wallpaper removed for one vertical strip. I was still working on the rest of the walls in these pictures.

Unfortunately, that is where my luck ran out.
After getting all the paper off, I realized the wall was still a little tacky and shiny.
There was a thin layer of the glue solution left on the wall itself. Bummer.

I have tried out a couple of solutions, but nothing has proven groundbreaking so far. Looks like I am in for a lot of wall-scrubbing with ole' fashion elbow grease.
Anyone have suggestions other than fabric softener, dish soap, or TSP?


Tuesday, October 21, 2014

BOO!

Since we bought our house, I have slowly but surely been creating and collecting holiday decorations.
Yes I had some before, but a house is much larger than an apartment which means more space to decorate! I am trying to focus on decorating just 2 or 3 areas for each holiday so I don't drive myself crazy trying to get everything set up before the holiday actually happens.
Each season I try to make / buy 2-3 small decorations so I am picking things I truly like and not just because I feel like I need to fill the space.

For Halloween this year I bought some fake, plastic chains and pumpkins that can be reused every year.
As for something crafty, I saw a great idea (on Pinterest of course) to transform wooden letters into a cute door-hanger. I found the letters at Meijer for $2-something a piece, picked up some glitter and ribbon, then headed home to get messy.

Inside my basement spray-booth (a large cardboard box with plastic draped over it) I hung up the letters on a hanger. It took quite a few rounds to do this project because I could only paint one letter at a time and had to re-position and spray paint them multiple times because of all the different sides. 

I started with a basic gray primer, then moved on to a semi-gloss black (because I happened to have it on hand already.)  


Once I had all the letters primed and painted black, it was time to glitter them!
I watered down some regular Elmer's glue, and washed a thin layer on just the top surface. Ok, so I ended up watering it down too much, but I have learned my lesson.

Then I liberally sprinkled the glitter on, which of course got everywhere!
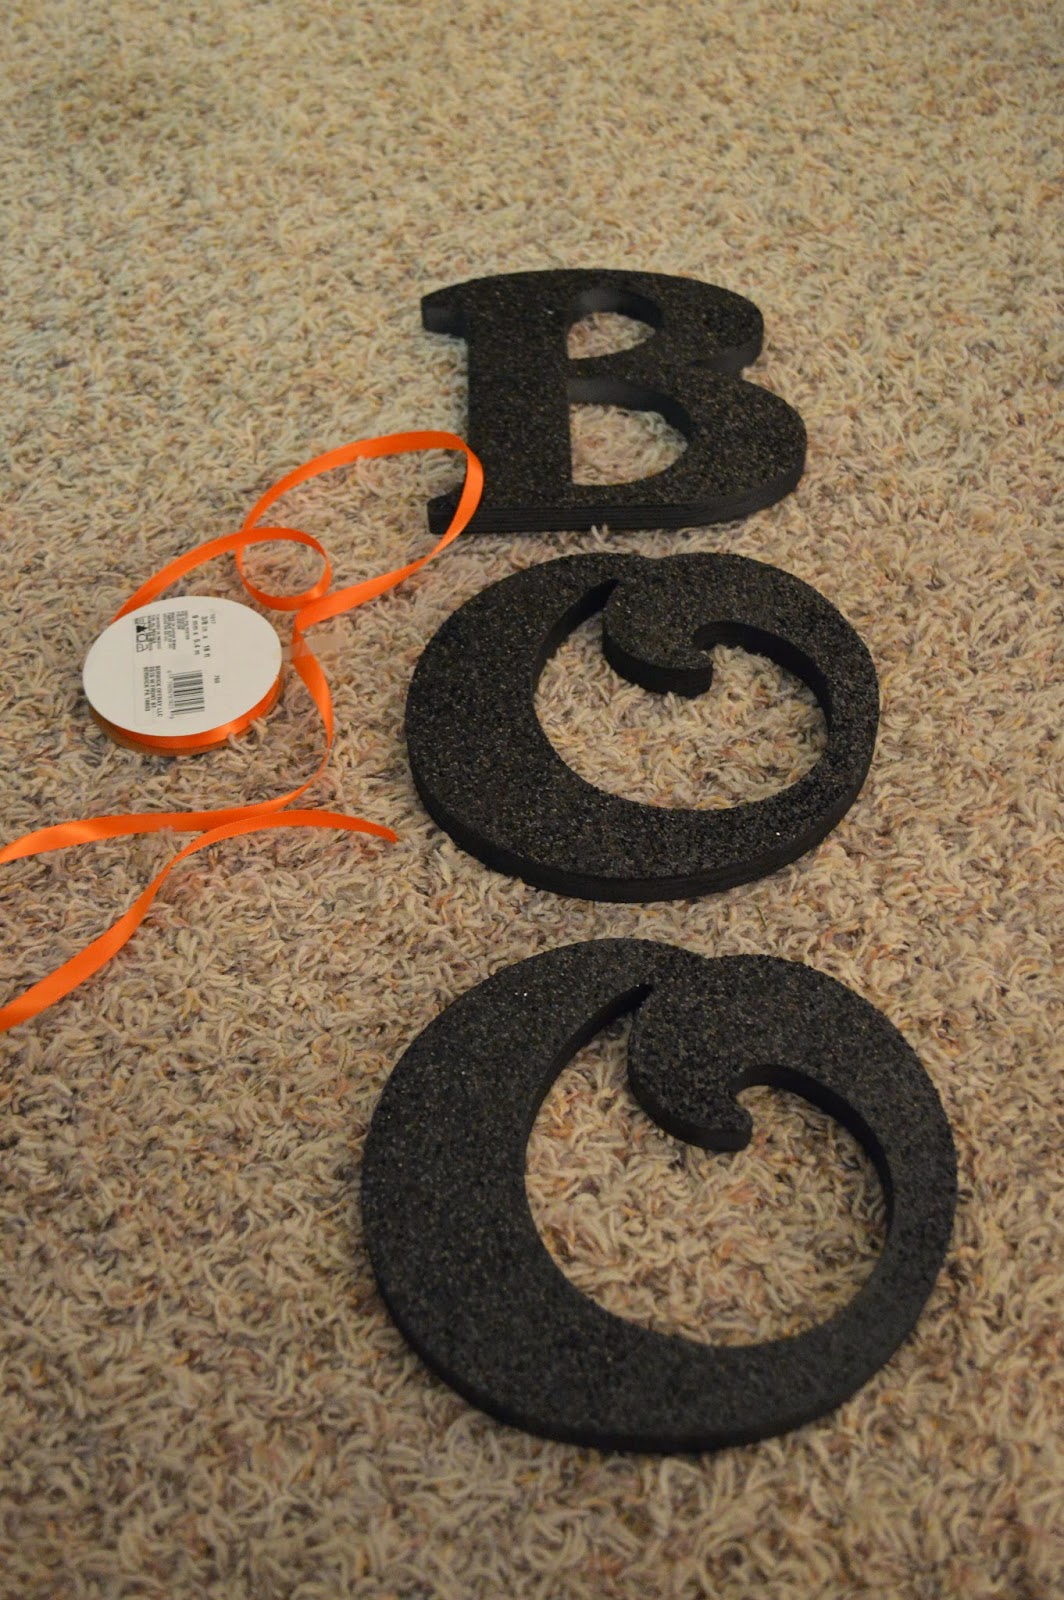
Below, the "O" is glittered and the "B" is waiting to get it's bling.

After they were all glittered and the glue dried, I sprayed them with a clear, semigloss topcoat to seal in the glitter. That way I'm not constantly tracking it around the house or getting covered every time you walk by it. Dear Husband (DH) hates anything glittery for this reason alone.

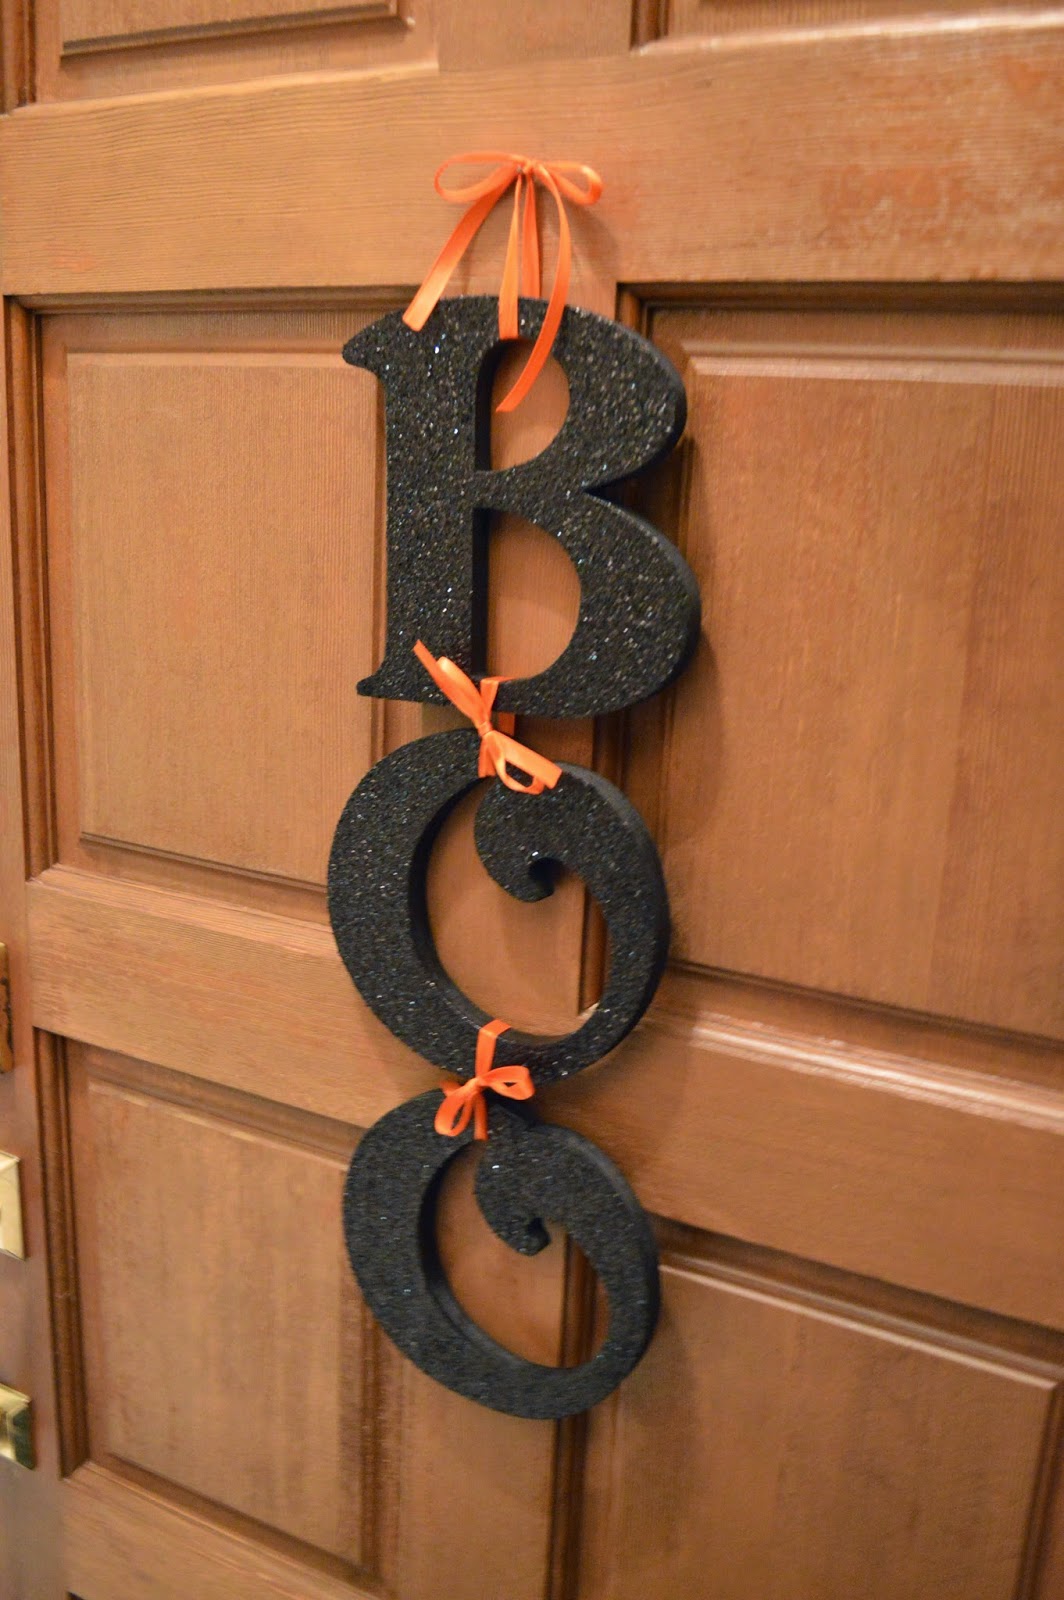
After most of the glitter had been sealed on, I got the orange ribbon out to tie everything together. Easy peasy! Nothing special, just a few cute bows and we were in business. I didn't even have to nail anything into to letters because I just looped and tied the ribbon right onto the letters. Eva was helping, but tuckered out just as we finished!

Since there is already a nail on our front door (from the previous owners) I just included a loop/bow on the top to hang on the nail.

Voila!


Saturday, October 18, 2014

Grandpa's Peppers

It is the end of the harvesting season for me, and I am just starting to clear out the garden in preparation of frost and snow. It seems like Spring was just here, and Summer was non-existent!

I got a few bags of tomatoes diced and frozen in the freezer to be used for sauces through the Winter. I did the same process last year blanching, peeling, packing, and freezing the tomatoes

This year, along with the tomatoes, I have been picking Grandpa H's (GPaH) peppers! These grew from the surprise seeds I received in the mail from GPaH this past spring.

They are sweet bell peppers, and some of them stayed green while others turned yellow! They were just so pretty, and everyone in the family loved eating them raw (even Eva got a small piece!)

Yum yum! Thanks GPaH!


Sunday, September 28, 2014

Harvesting Hops!

It was that time of the year again... time to harvest our beer!
Well, the hops that will go into the beer.
Last year we were newbies, and didn't really know what we were doing. All the same, DadB made some great tasting beer with them.

We have been so busy lately, we were probably a couple weeks late on harvesting the hops. Some of them are a bit more dried brown than others, but the pollen is still inside the cones, and that is the important part that flavors the beer.

We set them out on screens to dry for a few days. (They dry in the bright pink and yellow room that was painted by the previous owner.) We will get around to painting it eventually...

Once dried, we weighed them on a kitchen scale so we could seal them in 2 ounce packages. (I guess that is about how much you need per batch of beer.)
When weighing the dry hops they were a little smaller than a volleyball, but after vacuum sealing, they turned out to be about the size of a magazine.

I had never used a vacuum sealer before, so Eva was kind enough to help figure it out.

After a successful trial run, we started to get the hang of it and packaged 9 full bags and one more half full for a total of 19 ounces! Quite the harvest.  Into the freezer they went, to best preserve them until they can be used.

All that work called for a reward of a puppy-cuddle on the couch.


With hops season comes football season! Since everyone else in the family has a jersey, Dear Husband (DH) decided Eva needed one too! She looks adorable in it. I even caught a picture of her mid-yawn.


Monday, September 15, 2014

Crafty Tea Party Invites

It has been forever since I have had a chance to blog! I have been so busy!
It doesn't happen very often, but I have been feeling rather domestic lately. First I filled up 4 boxes for donation, mastered the blind hem stitch on my sewing machine (... ok, learned and tried it), gardened, and made invitations, favors, and decorations for SisX's bachelorette tea party. Whew!


We are so fortunate to have wonderful family able to travel and visit us. Last week alone, I cleaned the guest bed/bath rooms 3 times! We had three siblings over for the long Labor Day weekend, an Aunt and Uncle came Thursday for the football game, and two more siblings came the following weekend for the bachelorette party. All this during my birthday week! Are we blessed or what?!

The fox was a birthday present from Eva... who then promptly "borrowed" it and destroyed the squeaker for me.
Dear Husband (DH) was so sweet, and surprised me with a birthday weekend before all our guests came. He took me out to a special fancy dinner, got me flowers, and gifted me a new Chromebook to replace my old Netbook. The new Chromebook is so fast and I am loving it, especially the cool touchscreen!


Here are the invites I made for the bachelorette party. Since it was a tea and wine tasting party, I tried to make the invites look tea-stained.
I cut a teacup shape out of some floral craft paper and made a slit for a "pocket." Inside the pocket was a teabag shaped invitation.
I put a layer of velum over the top attached with a grommet to make it look a little bit fancier. Then I attached a little tag with a bit of string just like a tea bag.

Some stamping and ink around the edges made it look a little aged. Add a couple fancy stickers and a bit of washi tape for embellishment and added interest.

The back had a silhouette stamped on it that I cut out of some craft foam. Believe it or not, it is pretty tough to find a stamp of a pin-up girl pouring tea. Go figure.


I had also stamped the envelope to give it a little pizzazz.

For the party itself, we first stopped at a shop that has flavored olive oils and balsamic vinegars to taste, then moved on to two different wine tasting shops.  Once back home we had three or four different teas and many tasty treats made SisV, a masterful chef in disguise.

It was a wonderful outing and I really think SisX, the bride-to-be, enjoyed herself. Although she, along with everyone else, was skeptical of the green-apple dessert wine!