Thursday, November 20, 2014

Ceiling Madness and Mayhem

You may remember how much I HATE popcorn ceilings.
(If not, check out an old blog post here)

Well for the last three weeks, our house has been a disaster zone... and it is sooo worth it because the popcorn ceilings are gone!!!!

Here are a few gross "before" pictures before the contractors got their hands on it. (Ewww!)

Master Bath:


Living Room: (we had to move all the furniture to the center of the rooms)


Kitchen: (we removed the outdated light with help from Father-in-law (FIL))


 And then here is the in-process we have had to deal with for three weeks:

Master bath and bed


Here's the vaulted entryway:


And here are a couple photos of the smooth-as-satin ceilings!!!
(When I first saw them, I may have made some sort of noise resembling "Eeeeeeee!")


 The downsides?
- Well, the cost of course. But with the vaulted ceilings and the sheer volume of popcorn there was no way I was getting it done myself.
- We were migrants inside our own house for a bit there, but our own guest bed isn't so bad.
- Drywall dust EVERYWHERE. The crew we had did a great job of covering things up, but the dust snuck under the plastic and tarps.

All in all? Totally, completely, and utterly WORTH IT!!!!

I can't wait to get some paint on the walls, the furniture moved back, and everything a thorough wipe-down!


Thursday, November 13, 2014

Oh Sh*t Kit

It's the day of the big event, but then something happens or is forgotten... "Oh Sh*t!"
That is where the "Oh Sh*t Kit" comes into play.

I first put it together for my little sister's (SisV) wedding. It was part of my role to be prepared for anything. Since anything can happen at a wedding, I needed to be armed for everything.

In this instance, the wedding music had started and we were seconds from starting down the aisle. SisV was nervously picking at her cuticles. She then brushed her hand against her beautiful white gown, and a streak of red blood appeared!
We searched everyone looking for the source, and found her bleeding finger. (Panic may or may not have ensued.)

I grabbed the Oh Sh*t Kit and threw tissues at Mom so she could stifle the bleeding. I whipped out some SuperGlue (or Krazy Glue) which can be used as liquid stitches. While Mom applied the glue, SisV (the bride) hopped around because the glue stings, SisX was in her face calming and controlling the situation, while I dabbed the bloody gown with a wet tissue.

That moment seemed to last forever, but I think we got her finger and gown fixed up then shoved her out the door in less than 2 minutes. Whew!

Thankfully SisV has ALL the luck on her side, and her wedding was a spectacular and fun event! Seriously, NEVER play any game of chance with her... She is what balances Murphy's law in the universe.

I recently pulled this kit out again for my other sister's wedding (SisX). Her wedding was also spectacularly beautiful. While the kit did come in handy a few times, thankfully there were no major disasters to avert.

My Oh Sh*t Kit really consists of many mini kits each in their own Ziploc baggie (see left). This makes things quicker to find, easier to use, and simpler to put away.


The "Accessories Kit"
- Rings of various sizes (in case the bride and groom's have been lost or forgotten)
- Extra earrings (pearls and rhinestones in case the bride forgets hers)
- Extra earring backs
- Extra bracelet
- Matching earrings/necklace set


The "Hygiene Kit"
- Lady products (both kinds)
- Deodorant
- Razor (because "bride brain" is a real thing)
- Contact solution (also works as eye drops in a pinch)
- Contact case 


The "Hair Kit"
- Comb / Brush combo
- Hair ties
- Hair spray
- Bobby pins


The "Rx Kit"
- Benadryl (pills and cream)
- Tylenol
- Ibuprofen
- Tums
- Cough drops
- Neosporin
- Allergy pills
- Pepto Bismol

The "Mouth Kit"
- Mints
- Floss
- Mouthwash
- Toothbrush (I found these single-use Colgate Wisps with the toothpaste already included)

The "Hosiery Kit"
- Nylons
- Knee-highs
- Footie nylon socks
- Dryer sheets (You heard me right! Rub these on skin/fabric to get rid of that static cling on the inside of that wedding dress!)


The "Clean Kit"
- Hand sanitizer
- Bar soap (never know if the bathroom is missing it!)
- Lotion
- Moist towelettes
- Sunscreen (a must for outdoor weddings!)
- Bug spray (double-bag this puppy!)

The "Med Kit"
- Band-aids
- Gauze (roll / patch)
- Medical tape
- Butterfly bandages
- Alcohol pads (to disinfect)
- Super Glue (liquid stitches which came in handy!)
- Condoms (because you never know)


The "Fashion Kit"
- Stain stick (I had wipes too)
- Lighter (stops stray threads and frayed ribbon!)
- Regular tape
- Extra ribbon (I had black and white)
- Fashion tape (double sided to help keep fabric in place)
- Lint brush
- Floral pins (for stray boutonnieres, corsages, and bouquets)
- Mini sewing kit (needles, thread, scissors, pins, and SAFETY PINS!!! Safety pins are a must! So versatile. Between shoes, dress straps, bustles, etc., pack lots of these!)

The "Makeup Kit"
- Oil absorbing sheets (no shiny foreheads in pictures please!)
- Powder
- Mirror
- Clear nail polish (also good for runs in stockings and loose threads)
- Nail polish remover (I found wipes!)
- Eye shadow
- Nail kit (clippers, file, cuticle scissors)
- Tweezers
- Eye liner
- Mascara
- Lipstick
- Chap-stick
- Concealer (try to match the bride)

The "Sustenance Kit"
- Water! (for the bride... make her drink!)
- Straws (so she doesn't mess up her lipstick)
- Granola bars (a must for blood sugar boosts)
- Alcohol samplers (not enough to get drunk or spike the punch, but just for a little liquid courage if needed...)


Miscellaneous
- TISSUES!!! (I didn't bother putting these inside a mini-kit since they would be needed so often)
- Paper (never know when you might need a note)
- Pen
- Cotton balls
- Q-tips
- Playing cards (never know when someone needs to be occupied)


There you go, the all-encompassing Oh Sh*t Kit! Not even a quarter of these items were needed, but you never know which you will need. In the end it all packed in a bag about the size (and weight) of a bowling ball. Not too bad when you try to prepare for anything!


Monday, November 10, 2014

Goodnight Garden

GOODNIGHT GARDEN
The garden has been tucked away for Winter in it's beds,
straw as a blanket and with compost, it's been fed.

Garlic and asparagus sound asleep underground
and tools wait patient while cold silence resounds.

Wrapped and snuggled for the long winters night
the Hydrangeas hibernate, impatient for Spring light.


Ok, that's enough of that terrible nonsense! In reality we have been working hard to get everything prepared for Winter. I got my garlic in the ground just in time. The soil was just a little icy from the frost but warm enough to dig around in.
With those in the ground, we were able to add compost and straw on top. I didn't bother mixing the compost in, because the nutrients will naturally trickle down with the rain and melting snow. The 6-8" of straw prevents snow from compacting the soil, and helps keep an even temperature for the garlic and asparagus underground. (Too many freeze-thaw cycles can heave the plants toward the surface.)

While I was back there, I tried my best at a quick organization for the shed. I didn't have time to clean all the tools or oil them like I should, but sometimes there is only so much you can do. We need to fit our bikes in there for the winter so that there is room for a new snowblower in the garage!

We also wrapped the hydrangeas in burlap and filled them with leaves and straw. We didn't get many blooms last summer because the previous winter was so bitterly cold. (I'm just glad the plants themselves survived.) So in a test to see if we get more blooms next year, we have wrapped and insulated them. I have seen this done on a smaller scale with normal sized hydrangeas, but ours are giant so we will have to see how well it works.


Eva had to stay inside after she was naughty and ran after a neighbor!


The other project I just finished up was fences for the raised beds. I had started these fences in Spring, and it has taken FOREVER to finish them. I would do a whole post on them, but honestly I am kind of sick of them right now. They have been the elephant in the garage for over 6 months. Uh!
Here is where I got the inspiration from, but I replaced the wooden dowels with more PVC.


I finished them off just in time to get them out of the garage and into the shed for the Winter. At least they are out of view and off my "To Do" list!


On top of all this, Eva celebrated her 2nd birthday! She's not a big fan of wearing things on her head, so she found a different way to wear the tiara. Just look at that pose!


Monday, October 27, 2014

Wallpaper Gods

Like everyone from this decade, I hate wallpaper. There, I said it.
Thankfully our house came with very few papered walls when we bought it, but I am just now getting around to removing them.

Our kitchen and master bathroom have wallpaper boarders around the top of the walls, and our formal living/dining room had two "accent" walls with textured wallpaper. (See right.) Since we don't use our formal living/dining space very much I decided to start there.

I was super lucky... either this was really quality wallpaper (in it's day), or the wallpaper gods were in my favor. It peeled off so much easier than I expected! 

First, you want to pull off just the top "face" of the wallpaper. Let me explain...
You know how you try to pull off a price tag sticker, and just the top layer peels off, leaving the glue and a fuzzy layer of paper? Exactly like that: you actually WANT the glue and fuzzy later to stay on the wall and just peel the facing off.

I tried to get a picture of the face, then the glue/fuzzy layer that I am pinching, and the wall behind.

If you try to peel off the glue/fuzzy layer while it is dry, it will take some of the drywall with it. (See picture to the right.)

Yeah, I learned that one the hard way.
As much as you want to pick at it, just leave it alone!


So carefully peeling just the top layer off, I was expecting just small bits to tear off, but because this wallpaper was so thick and textured, it came off in one entire sheet! Starting at the bottom, I oh so carefully peeled the top surface from the glue/fuzzy layer, slowly peeling all the way to the ceiling. I couldn't believe it came off all in one sheet! (I only wish I had a picture!)

I tried to take pictures showing one strip (floor to ceiling) removed, but it is tough to see in photos with that light.


So that left me with a fuzzy wall... now what?

Well, as seen before, you can't peel at it while it is dry, so you need to wet it down.

First tape-off your baseboards and protect the carpet with plastic. This is a must, because water will be dripping down the walls.

After some searching online, numerous posts suggested adding fabric softener to hot water and spraying the mixture on the wall. 
I don't use fabric softener, so I bought the cheapest big bottle I could find. 
In a spray bottle I filled about 1/4 to 1/3 with fabric softener and the rest with hot water, but I soon found out that I didn't need that much fabric softener. I ended up using about half of what is shown in the picture.

So, with my hot water / fabric softener spray in hand, I tested it out on a small patch of the fuzzy wall. I sprayed it on liberally (hence the plastic on the floor) and waited. I waited about 5-10 minutes. The darker, bottom part of the wall is the wet part, soaking in and softening the glue.

Once again, I expected to have to scrape, scrape, scrape little bits off the wall. I even got my steam mop out to see if that would help along with the soaking.


But again, the wallpaper gods were with me! The glue/fuzzy layer also came right off in sheets!
I got so excited, and Dear Husband (DH) had no clue why I was so ecstatic. Even after I explained, I don't think he appreciated the enormity of my discovery/luck.

He was kind enough to get a picture of me testing out the wet glue layer. (Can we stop a minute and appreciate how good my hair looks in that picture!? I NEVER have good hair days! Thank you DH for capturing it on film!)

Here are the walls with all the wallpaper removed for one vertical strip. I was still working on the rest of the walls in these pictures.

Unfortunately, that is where my luck ran out.
After getting all the paper off, I realized the wall was still a little tacky and shiny.
There was a thin layer of the glue solution left on the wall itself. Bummer.

I have tried out a couple of solutions, but nothing has proven groundbreaking so far. Looks like I am in for a lot of wall-scrubbing with ole' fashion elbow grease.
Anyone have suggestions other than fabric softener, dish soap, or TSP?


Tuesday, October 21, 2014

BOO!

Since we bought our house, I have slowly but surely been creating and collecting holiday decorations.
Yes I had some before, but a house is much larger than an apartment which means more space to decorate! I am trying to focus on decorating just 2 or 3 areas for each holiday so I don't drive myself crazy trying to get everything set up before the holiday actually happens.
Each season I try to make / buy 2-3 small decorations so I am picking things I truly like and not just because I feel like I need to fill the space.

For Halloween this year I bought some fake, plastic chains and pumpkins that can be reused every year.
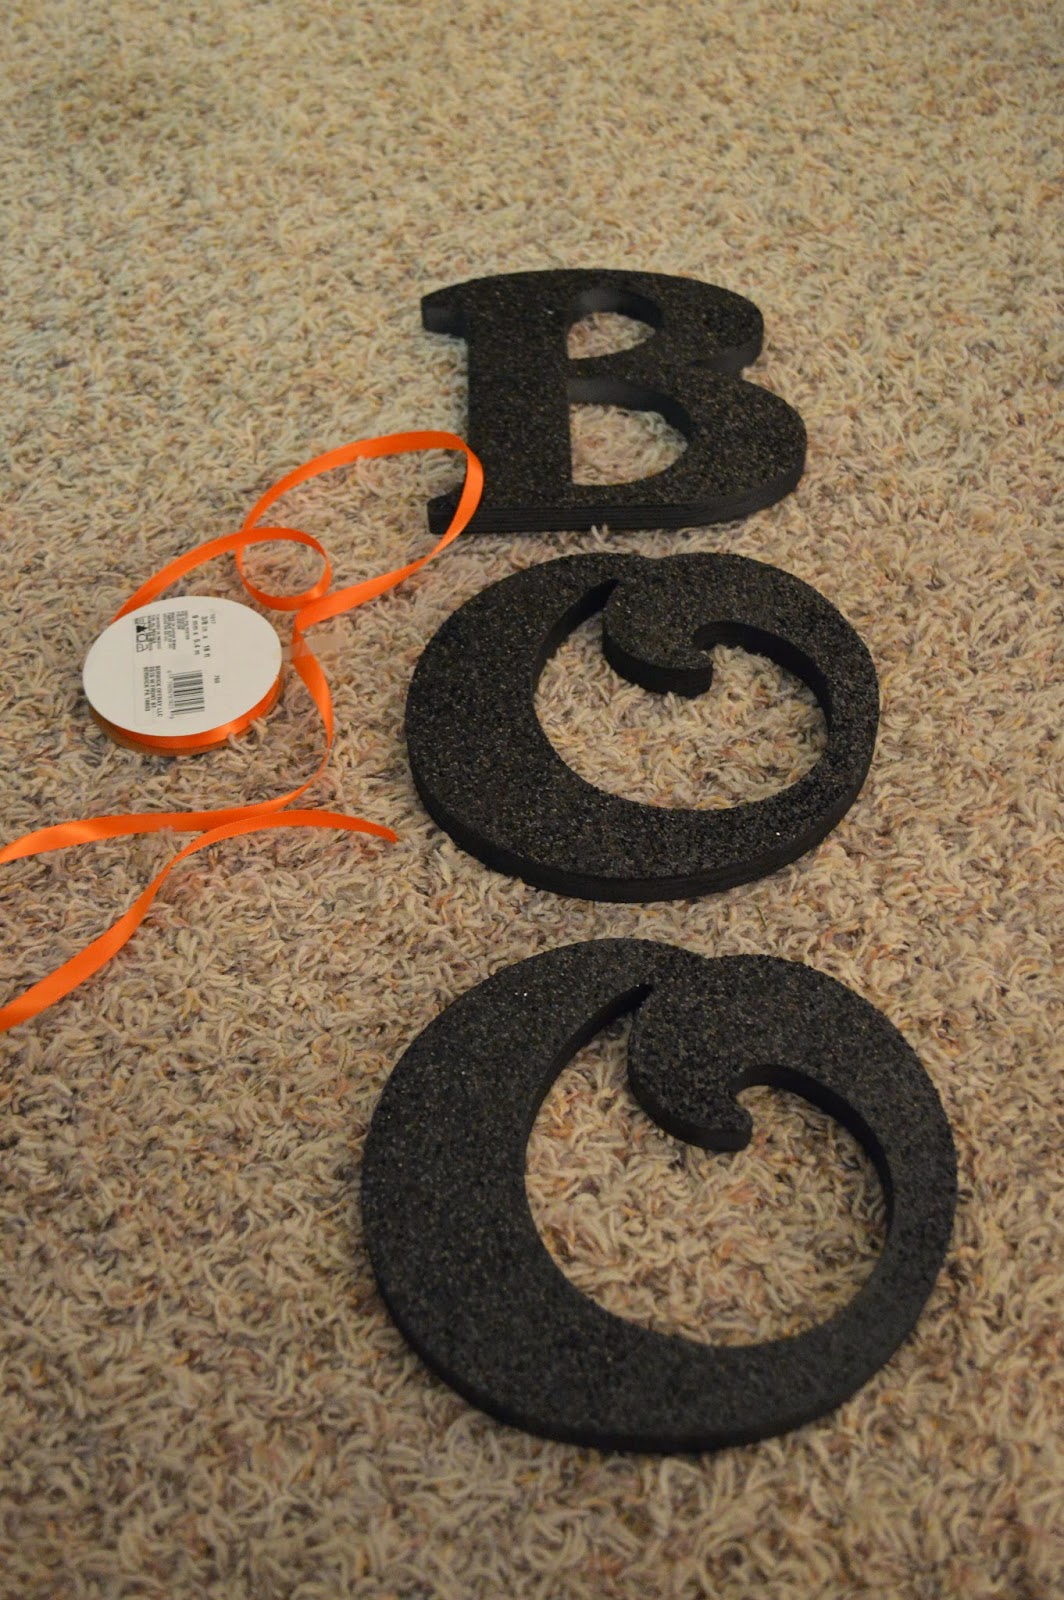
As for something crafty, I saw a great idea (on Pinterest of course) to transform wooden letters into a cute door-hanger. I found the letters at Meijer for $2-something a piece, picked up some glitter and ribbon, then headed home to get messy.

Inside my basement spray-booth (a large cardboard box with plastic draped over it) I hung up the letters on a hanger. It took quite a few rounds to do this project because I could only paint one letter at a time and had to re-position and spray paint them multiple times because of all the different sides. 

I started with a basic gray primer, then moved on to a semi-gloss black (because I happened to have it on hand already.)  


Once I had all the letters primed and painted black, it was time to glitter them!
I watered down some regular Elmer's glue, and washed a thin layer on just the top surface. Ok, so I ended up watering it down too much, but I have learned my lesson.

Then I liberally sprinkled the glitter on, which of course got everywhere!
Below, the "O" is glittered and the "B" is waiting to get it's bling.

After they were all glittered and the glue dried, I sprayed them with a clear, semigloss topcoat to seal in the glitter. That way I'm not constantly tracking it around the house or getting covered every time you walk by it. Dear Husband (DH) hates anything glittery for this reason alone.

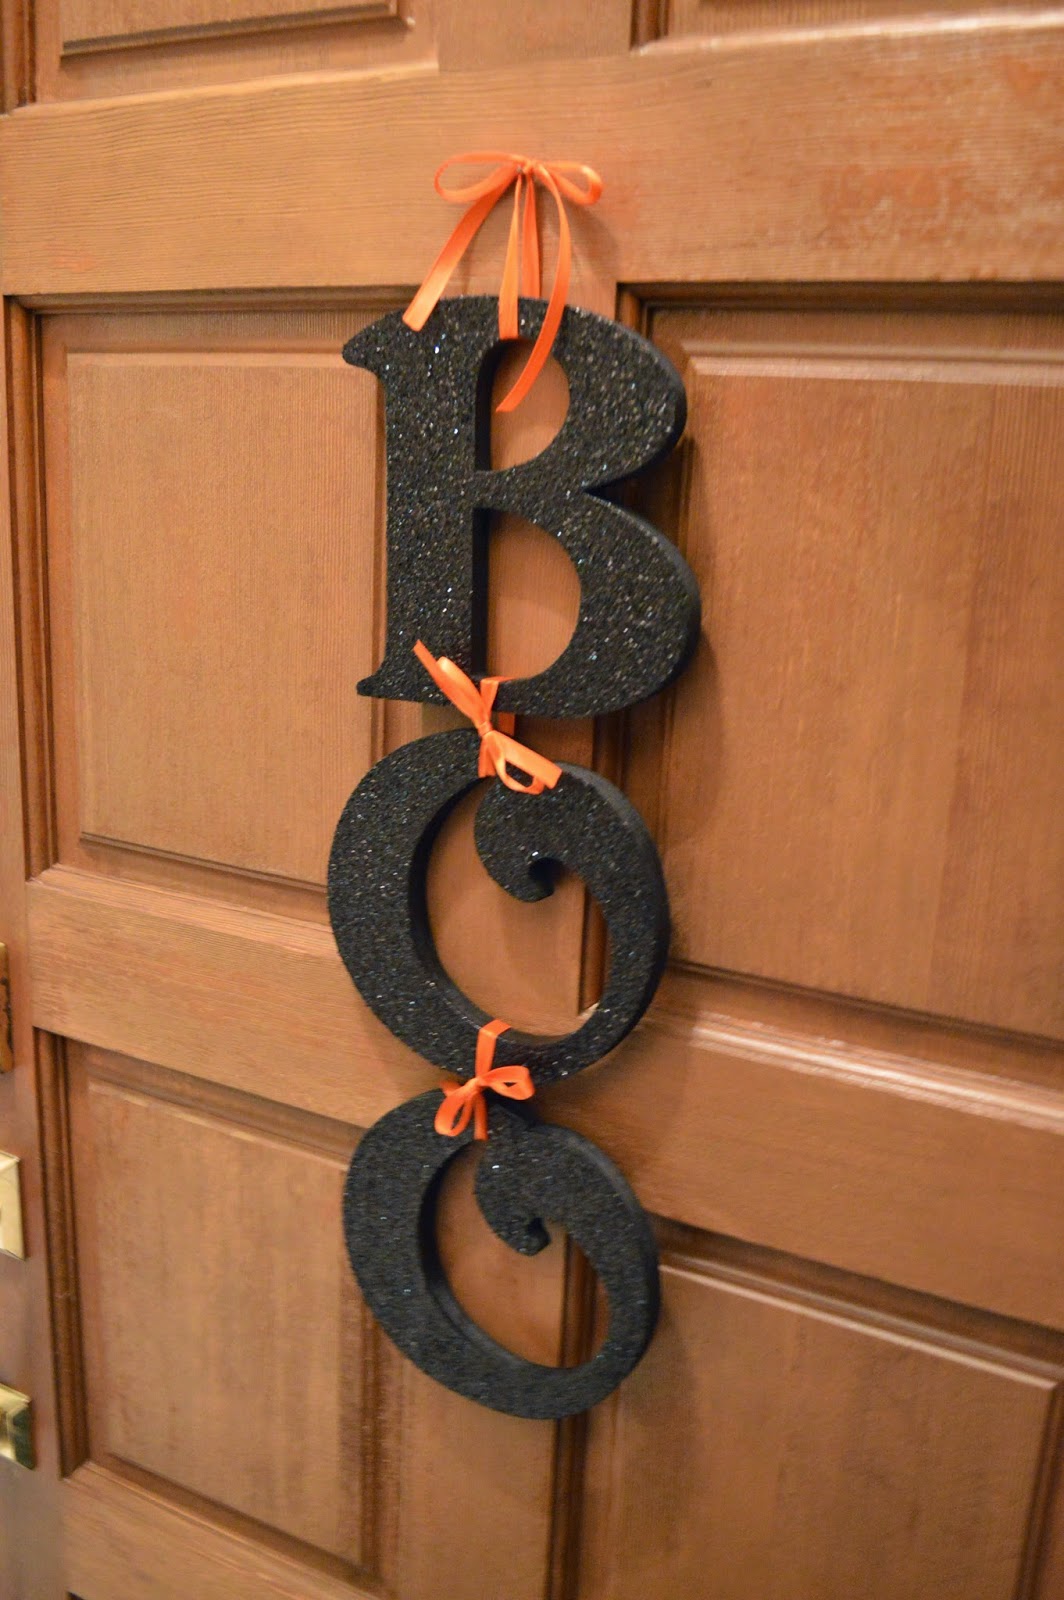
After most of the glitter had been sealed on, I got the orange ribbon out to tie everything together. Easy peasy! Nothing special, just a few cute bows and we were in business. I didn't even have to nail anything into to letters because I just looped and tied the ribbon right onto the letters. Eva was helping, but tuckered out just as we finished!

Since there is already a nail on our front door (from the previous owners) I just included a loop/bow on the top to hang on the nail.

Voila!