Wednesday, October 30, 2013

Stewper Sunday

What kicks off Fall better than soup or stew burbling on the stove? Lots of soups or stews cooking on the stove!
We are slowly developing a family tradition of "Stewper Sunday." It started as "Soup-er" Sunday but we were making stews too, so we had to change the name.

1. First we pick a date that works for most of the family. Trying to coordinate four household schedules can be tricky!
2. Then we decide what soups and stews we want to make.
3. Compiling a list of ingredients, we keep track of the costs so we all split the tab evenly. We are making multiple batches of each recipe, and it pays to buy in bulk.
4. Cook and have fun!
5. Package in meal-size portions for freezing
6. Split up the goodies so everyone takes some home

It is fantastic because you have a variety of hearty meals in the freezer, ready to thaw and enjoy.

So what was on the menu?
- Mom's famous chili (she always makes this since it is such a hit!)
- Dad's famous pea soup (he always makes this too, I actually think it's pretty good and I don't like pea soup!)
- Marinara sauce (from the recipe before...)
- White Bean and Bacon stew (new recipe to try)
- Acorn Squash Soup (another new recipe to try)

I would share with you Mom's chili recipe, but her literal recipe is "keep adding things until it smells right". Helpful Mom, thanks. This is as close as we have gotten without video taping her, and measuring things before she puts them in the pot.

Mom's Classic Chili

1.5 lb hamburger
med - small onion cubed (diced)
med. green pepper cubed (diced)
1/2 can tomato paste
32 oz can crushed tomato
16 oz can diced tomato
1 can pinto beans
2 cans of LIGHT Red Kidney beans
1 bay leaf
2 tsp. brown sugar
1 tbls salt
1/2 tsp pepper
2 tbls chili powder (it's probably more like 4 Tbs since she keeps adding "till it smells right")
- Brown hamburger.  Drain
- In sauce pan and olive oil saute onion and green pepper.  
- Add tomato paste --stir 
- Add all the rest of the ingredients.  
- Burble on low simmer for several hours.    
- Check taste for spicing and adjust. If still too acidic add more sugar.


I would share the pea soup recipe, but Dad does the same kind of thing... adding whatever veggies (carrots, onion, etc.) happen to be in the fridge. I can tell you that his secret ingredient is Lawry's seasoned salt, and lots of it!

The White Bean and Bacon recipe was inspired by this one here, but we tweaked a few things. It ended up tasting even better than I expected!

Slow Cooker Ham & White Beans
1 lb package dried northern beans (ended up using canned so it would go quicker)
3/4 lb bacon (fried up to a crisp and chopped up before adding to crock pot)
2/3 cup diced yellow onion (or 2 tsp onion powder)
6 cups water (didn't need this much since we were using canned)
salt & pepper to taste (don't need too much salt due to the bacon)

1. Throw it all in a crock pot
2. Set on low for 8 hours
3. Serve up with your favorite cornbread
yum yum yum

Acorn Squash
The Acorn Squash soup was completely new for us. We love butternut squash soup in restaurants, but have never made anything like it before. I had grown all these beautiful acorn squash in my garden, so I wanted to try it out. Since you can't really go wrong with Food Network, we tried out Guy Fieri's recipe, here.

The cayenne pepper gives it just a tiny hint of heat, and although we cut down on the white pepper for the second batch, it was still seriously tasty! We also got to play with my immersion blender for the first time.
One thing we did differently is omit the cream... for now. Cream doesn't freeze very well (it separates), so we made the rest of the recipe as-is, then froze it. Now when we re-heat it, we will add in the cream to round out the soup.

Now our freezer is stocked with 8 servings of marinara sauce, 2 servings of pea soup, 4 servings of chili, 4 servings of squash soup, and 4 servings of bean/bacon soup. And since we all split the cost, we made all that for $35! What a deal!

Sunday, October 27, 2013

Fall Cleanup

Well, it is that time of year again. 
With the cooler weather upon us, I have been scrambling to get the garden all cleaned up and ready for winter. Here is what I had to deal with at the end of the season: Huge tomato plants with lots and lots of green tomatoes. Also tons of marigolds and a few giant artichoke plants to pull up. Whew! At least Eva was there to help!
You may have noticed the pavers now surrounding the raised beds...
My poor Dear Husband (DH), he is such a trooper. I carefully calculated how many I would need, added in a couple extra just in case, and submited my order online.
I know 140 pavers is a lot, I just didn't realize how much until we went to pick them up at the home improvement store. Holy cow.
We had brought both our cars because I knew we would have to make multiple trips due to the weight.
It turned out to be 3 trips back and forth with both cars... that's 6 car-loads. I am starting to think the $60 delivery fee may have been worth it.

We didn't have time to sink them level with the lawn, so they are just sitting on top for now until next season. As you can see to the left, two of my raised beds are a little close together, so I will have to chisel those blocks smaller next year.

So after plucking off all the green and red tomatoes, DH helped me pull out the plants and toss them into the trash. I would have composed them, but they had some spots and yellowing leaves at the end of the season.


After clearing all the plants from their beds, I raked the soil smooth and spread some "cover crop" seeds. I planted winter rye which should germinate a little before the snow comes, then spring back to life when the weather warms back up. Cover crops help to keep the soil from eroding, keep it aerated, and return nutrients when they are turned under in the spring.

In one area, (to the left of the "line") I planted my garlic and shallot bulbs. They are like flower bulbs, and like to over-winter in the frozen soil.

While it is sad to see the garden sleeping in their beds, it will be nice to have a break, and a chance to get some things done inside the house!

I still had one problem... our kitchen counters looked like this: 


Wow, that is a lot of green tomatoes... why bother, you ask? Well let me share. Here is how I am storing the green ones. Yes, with a banana. As it ripens, the banana releases ethylene gas which makes other fruits ripen as well. Just make sure the check it every few days, and replace the banana when it gets too old! 

So what to do with the ripe ones? Marinara sauce!
Here is Mom and Sister X helping to make a whole bunch of soups and stews on our "Stewper Sunday."
More on that next post!


Monday, October 7, 2013

Giant Mirror

The Case of the Giant Mirror

I was toddling around a neighborhood garage sale this Summer and came across this fantastic deal. A giant 3'x3' mirror for only $2! Well yes, it was too good to be true because it had a chip out of one corner, which is probably why it was only $2 to start with. I figured I could just make a frame to put around it and solve that issue all too easily, so I snapped up the mirror. It barely fit in the car, so it was a good thing our house was just down the street. Oh, did I mention... this mirror is HEAVY.

This mirror has no backing on it so it is basically a large, beveled piece of glass. I thought of every way you could possibly attach a frame to this thing and get it up on the wall. (Some methods were more destructive and passive aggressive than others.)

Thankfully, my parents came up to visit that weekend so I explained my predicament to my dad. Put two ex-mechanical engineers on a problem and we will come up with every idea in the book... and out of it for that matter. We must have spent over an hour brainstorming possible options and discussing the pros and cons. I think we both had a great, geeky time of it too. Mom and DH (Dear Husband) were probably cracking jokes at us, but we were too enthralled to pay attention.

Dad came up with a simple, elegant solution. At first I wasn't convinced, but eventually the inevitable happened: Dad was right... as usual. (Thanks, Dad.)

He suggested attaching the mirror to the wall using the flat metal mirror clips (see left), rather than the plastic ones that stick out farther from the wall. Then use industrial strength velcro to attach the frame to the mirror. This allowed the weight of the mirror to be directly supported as designed, but the frame would hide the clips and be removable so you could relocate the mirror at a later date without trashing the frame. Like I said, simple but elegant. 


So here is how I mounted the mirror: 
1. Take out your lime-green wrapping paper and cut out a square the same size as your mirror. Ok, you can use purple polk-a-dot paper if you want.
2. Tape it to the wall with blue painter's tape so it doesn't leave the wall sticky. Stylish, no? (The idea is to determine the exact location of the mirror, without trying to get Dear Husband, DH, to hold 20lb of fragile mirror against the wall for 10 minutes)
3. Measure, and draw a schematic
 
4. Using a studfinder (and after making a few suggestive comments to DH) locate the wall studs. I ended up shifting the mirror over about 4 inches so that all four mounting clips could be screwed into studs. (Ours are 16" on center)
5. Measure again, level, and mark the location of your mirror mounting clips
6. Drill pilot holes, and screw in the bottom mounting clips. 
7. GENTLY place the mirror in the lower clips and hold it against the wall to confirm the location of the top clips. It is such a good thing I did this, or else my clips would have been a foot too low! Measure twice, drill once. (Repeat as a mantra). Set mirror aside.
8. These clips have a slot instead of a hole for the screw. Mark the final location for the upper clips, attach to the wall with the screw at the TOP of the slot, and tighten SLIGHTLY. You should just be able to move the clip up and down, but if you let go while it is slid "up," it should hold in place.
9. Slide top clips up, so that the screw ends up at the bottom of the slot.  
10. Place mirror in the bottom clips, lean carefully against the wall (making sure not to bang too hard into the top clips)
11. Slide the top clips down to "grab" the top mirror edge, holding it to the wall
12. Ta-da! Take a step back to admire your work... then go in search of Windex to clean off all the smudges! 


The Frame: 
I created the frame in the same way as the frame for the map on one of my previous posts. See step 5 about half way through the post.
(See the map post here!)
Eva is such a great model, isn't she?

I painted the frame first with a "bonding" primer so the paint would really grip it.

Then I painted with a "satin enamel" coat for that polished Pottery Barn look. It turned out a little more glossy than I wanted, but I think it still looks great.

Putting it together:
I bought the super strength velcro with the sticky backing to mount the frame to the mirror. Removing the film to expose the sticky side of the velcro, carefully line up the frame with the mirror. Try to get as close as possible because you only have one shot, and... stick it to the mirror.
Here is the finished product with everything in it's spot. I am amazed what a difference the frame made!
 
That is the buffet/wine rack that DH's uncle made us for a wedding gift, and the figures are our Chinese zodiac "cake toppers" made by an artist friend as a wedding gift. (Her blog here!)


Tuesday, October 1, 2013

The Escape Artist

Being the mischievous little puppy she is, Eva has become quite the escape artist. Specifically, when we are gone and she is gated in her laundry room.

So you know that we put up a board and a chair, and she manages to nose them aside and scramble over. (See right)

Then she goes to work on her toys, and here is the result...


The solution is to make the gate taller, right? So I cut a piece of pegboard to size and zip-tied it to the gate. I was convinced this would be the solution, but Eva had other ideas.
While we were gone, in her boredom, she chewed or clawed the side of the board and squeezed through an impossibly small gap and wreaked havoc yet again. Yes, yes she did get through that little gap between the board and the door frame. 


So we borrowed a second puppy gate. This actually worked! For one day. The next day I found the barrier intact, but Eva on the wrong side. I actually needed to remember if I had put her inside. (I had.) The picture to the left is the exact set-up she must have  scrambled over. That is about 3 feet high. Eva is only about 20 pounds. You do the math.

The casualty this time? Her stuffed squirrel which is now hand-less, and one of my socks is now down for the count.

Eva's look says, "See Mom, this is what you get when you leave me... if you would just stay, I wouldn't have to do this!"

Today I put the second gate up higher. It is now about 4.5 feet tall, assuming she hasn't already knocked it down. If this doesn't work, I am all out of ideas short of putting the laundry room door back on. But I fear she will just destroy that too since it is a hollow-core door.

She is so smart, she gets bored quickly. We give her toys, water, chew sticks, peanut butter, and outside access through a doggie door to dig holes... but it never fails. A bored puppy is a naughty puppy.


Monday, September 23, 2013

Toilets, gutters, and siding. Oh My!

Ok, time to DIY, and fix those small pesky things before they become a big problem.
On the list today are toilets, gutters and siding.

Let's start with the toilet.
When we moved in 10 months ago, all three toilets in our house were "running" and wasting water. That was one of the first new-homeowner projects I tackled: fixing toilets... it was then that I knew this was going to be a glamorous job!
The guest bath needed a new seal... no problem.
The master bath needed a new "float valve" since the apparatus that the floaty-ball was attached to wouldn't close all the way. A trip to the hardware store, and a few hours sitting backward on the toilet lid trying to figure out the directions, and I got that one fixed too.
The half bath I "Jimmy-rigged" to work for a little longer but I knew it would eventually need the same fix as the master bath.

Well, 10 months is pretty good for a temporary solution, but it started running again. The float valve in the picture above was actually a cheapo part that I had grabbed, but our water pressure must be pretty high because one of the internal seals was too weak and it didn't work. I had to buy another, better one that ended up working. Just goes to show that you should always buy quality, even when it comes to toilets.


Next up was the gutter.
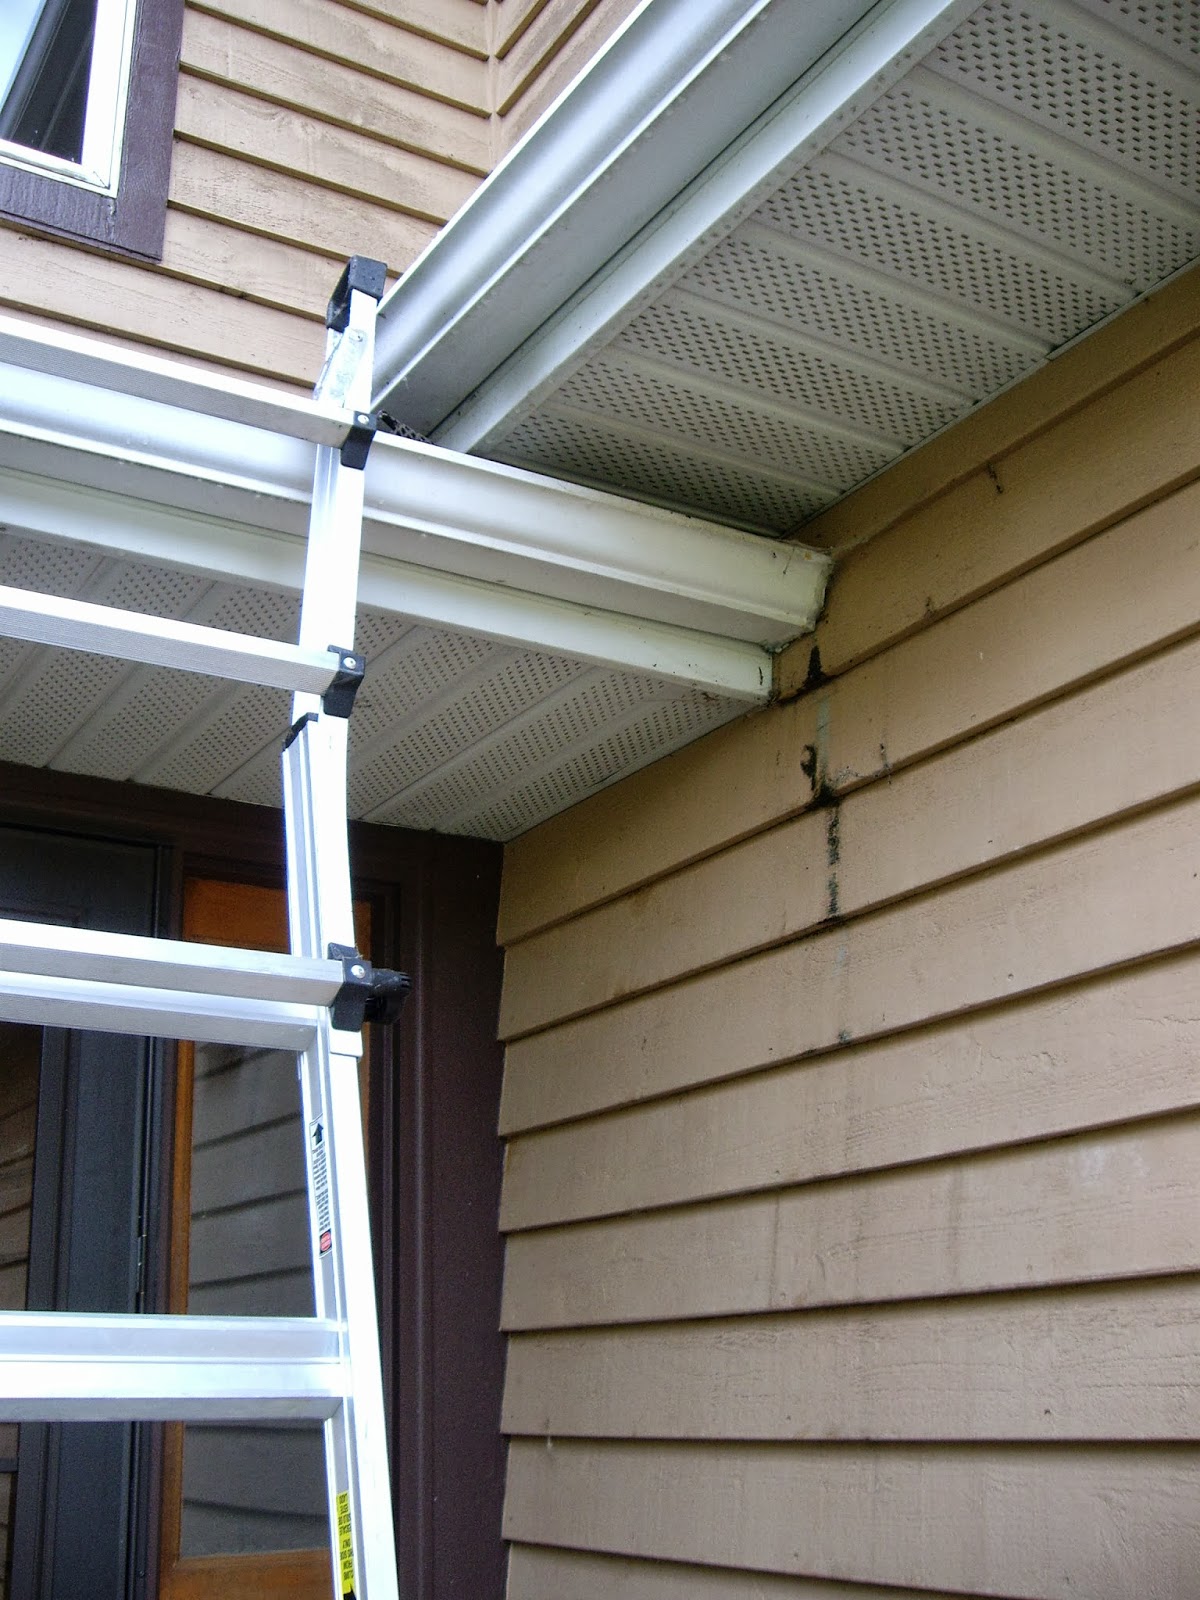
Since we moved in, there has been an eye-sore by our front door. As you are standing there waiting for us to get Eva to quit barking from the doorbell, you look around and see mildew on part of the siding from a leaky gutter. Ew.

We could see that the previous owner had tried to caulk it on the outside, but you really need to do it on the inside of the gutter. The problem? The gutter extends underneath the adjacent roof slope, so there is no way you can get a caulking gun under there. Crud.
I ended up buying a gutter end-cap, and after a little trimming I created a divider. I proceeded to caulk the heck out of it (with gutter-specific caulk). If this could even work, I was going to make it work!


Of course even through there was only a 10% chance of rain, there was a downpour that night. I was convinced it would ruin the wet caulk, but it ended up holding!
After cleaning off the mildew, the siding really needs some new paint, but it is already looking better.


Speaking of siding...
When we first moved in, the inspector had pointed out the join where the brick facing meets the cedar siding. After 20-some years, the heavier brick had settled more than the siding and created a gap between the two. Even though they were caulked back then, it has since worn away or been pulled apart.

Since we don't want any buggies or moisture getting in there, he suggested re-caulking it. (Can you tell that caulk is my new favorite tool?) So I picked up some siding caulk that can be painted over. Here it is all fixed up (a little messy because of the rough surfaces), but it will dry clear and not be so noticeable.


Oh and while I was busy fixing things, Eva was busy destroying more things. Here is her Kong that she has been slowly picking apart. It is even the "industrial strength" black colored one that is supposed to hold up better than the red ones. She grabs the inside edge with her front teeth and picks off little pieces, but at least she drops them and doesn't try to eat them.

And lately she has gotten into the bad habit of jumping the puppy gate while we are at work. Even after we put up a board and a chair, she manages to nose them aside and scramble over.

Then she goes to work on her toys. She is part terrier after all.