Monday, September 23, 2013

Toilets, gutters, and siding. Oh My!

Ok, time to DIY, and fix those small pesky things before they become a big problem.
On the list today are toilets, gutters and siding.

Let's start with the toilet.
When we moved in 10 months ago, all three toilets in our house were "running" and wasting water. That was one of the first new-homeowner projects I tackled: fixing toilets... it was then that I knew this was going to be a glamorous job!
The guest bath needed a new seal... no problem.
The master bath needed a new "float valve" since the apparatus that the floaty-ball was attached to wouldn't close all the way. A trip to the hardware store, and a few hours sitting backward on the toilet lid trying to figure out the directions, and I got that one fixed too.
The half bath I "Jimmy-rigged" to work for a little longer but I knew it would eventually need the same fix as the master bath.

Well, 10 months is pretty good for a temporary solution, but it started running again. The float valve in the picture above was actually a cheapo part that I had grabbed, but our water pressure must be pretty high because one of the internal seals was too weak and it didn't work. I had to buy another, better one that ended up working. Just goes to show that you should always buy quality, even when it comes to toilets.


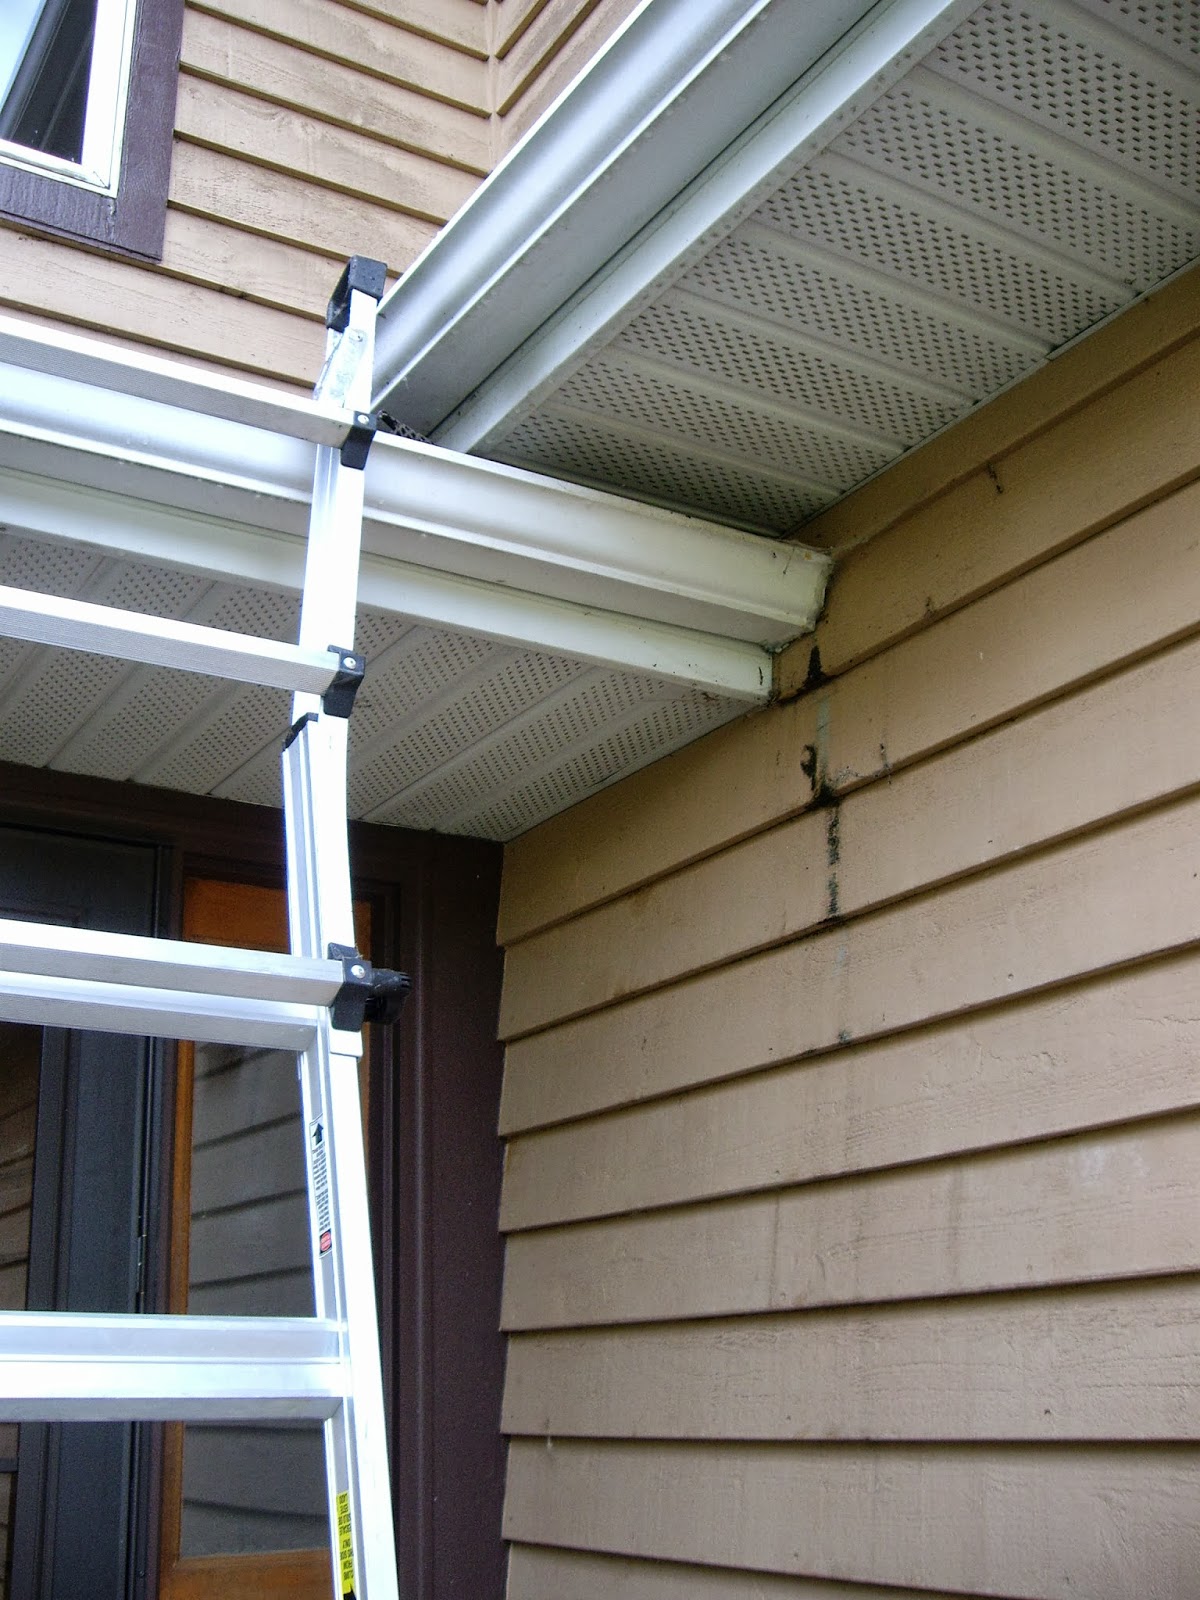
Next up was the gutter.
Since we moved in, there has been an eye-sore by our front door. As you are standing there waiting for us to get Eva to quit barking from the doorbell, you look around and see mildew on part of the siding from a leaky gutter. Ew.

We could see that the previous owner had tried to caulk it on the outside, but you really need to do it on the inside of the gutter. The problem? The gutter extends underneath the adjacent roof slope, so there is no way you can get a caulking gun under there. Crud.
I ended up buying a gutter end-cap, and after a little trimming I created a divider. I proceeded to caulk the heck out of it (with gutter-specific caulk). If this could even work, I was going to make it work!


Of course even through there was only a 10% chance of rain, there was a downpour that night. I was convinced it would ruin the wet caulk, but it ended up holding!
After cleaning off the mildew, the siding really needs some new paint, but it is already looking better.


Speaking of siding...
When we first moved in, the inspector had pointed out the join where the brick facing meets the cedar siding. After 20-some years, the heavier brick had settled more than the siding and created a gap between the two. Even though they were caulked back then, it has since worn away or been pulled apart.

Since we don't want any buggies or moisture getting in there, he suggested re-caulking it. (Can you tell that caulk is my new favorite tool?) So I picked up some siding caulk that can be painted over. Here it is all fixed up (a little messy because of the rough surfaces), but it will dry clear and not be so noticeable.


Oh and while I was busy fixing things, Eva was busy destroying more things. Here is her Kong that she has been slowly picking apart. It is even the "industrial strength" black colored one that is supposed to hold up better than the red ones. She grabs the inside edge with her front teeth and picks off little pieces, but at least she drops them and doesn't try to eat them.

And lately she has gotten into the bad habit of jumping the puppy gate while we are at work. Even after we put up a board and a chair, she manages to nose them aside and scramble over.

Then she goes to work on her toys. She is part terrier after all.


Thursday, September 19, 2013

Fall Harvest


With the pending cool weather, the plants know it is time to get off the vine before the first frost hits.
Unfortunately this means they all seem to ripen at the same time!

After procrastinating a few days (that's an understatement), I finally got around to picking all the ripe fruit off my giant tomato plants and wilting squash vines. Here is the result:
My first ever artichoke! And it actually tasted like a real artichoke!


Quite a few squash from just four plants.  The squash just needed a quick rinse in the sink, then they can be stored in the cool, dry basement through the winter. I think acorn squash soup may be in our future!


A lot of tomatoes (left) from my ginormous tomato plats (below) that ran out of room to climb so the started to fall over, along with Eva posing nicely.


There are still a few left on the vines ripening, but this is the majority of the harvest.

The tomatoes need to be frozen or canned. Since I am not yet experienced at canning, I chose to freeze. The longest and most painstaking process is peeling them. While you can freeze them with the skin on (cleaned first), I want to use these for marinara and don't want the skins turning it bitter.
Here is a good explanation of blanching, it involves dunking them in boiling water which also helps to kill a lot of bad bacteria.
Two hours later, after they were all blanched and peeled, DH (Dear Husband) helped me put them in plastic baggies to freeze. Three, gallon-size baggies, what a haul! You want them sitting in a single layer so the freeze quicker, with as little air in the bag as possible. I close the baggies, then open them up just enough to fit a drinking straw into. Flatten out the tomatoes and press out as much air as you can with your hands. Then you suck out as much of the remaining air as you can. Kind of the inverse of blowing up a balloon. Just keep an eye on the end of your straw that is in the bag, or you will be sucking up tomato juice... ahem, not that I know from personal experience or anything (cough, cough).

Now when I have the inkling to make marinara, I can set them out to thaw then smash them right in their baggies before dumping into the sauce!

The other crop that ripened was our first ever harvest of hops. No, not like a bunny hops... beer hops! Since it is the first year for most of the rhizomes (hop plants), we didn't think we would get anything usable... we were wrong. While most of them are not full size, I think they will still be usable but that is ultimately up to FIL (Father In Law) who is the brewer. Here is a hop from one of the older plants, it's huge!


After picking them all off the prickly bines (yes, Bines, not Vines) we spread them out on screens under a ceiling fan to speed the drying process along. Think of them like herbs... you can use them either fresh or dried, but they are more potent when dried.

Hopefully they will meet the master brewer's standards so he can use them!


Eva was helping... or at least she thought so.


Or maybe she just thought it was funny...


Tuesday, September 10, 2013

Garden Goodies

Heavens I have been busy lately! (That is my poor excuse for not posting for such a long time.)
I have been kept busy by all the garden goodies which seem to ripen all at the same time.
All my tomatoes seemed to stay green for weeks and weeks, so when they finally started ripening I had tomatoes coming out my ears!
What to do with all these? Make salsa and marinara of course! Thankfully my sister, MD, (technically sister-in-law) was there to help. I worked on blanching the tomatoes to remove the skin, while she sliced and diced all the salsa ingredients.
Blanching is the easiest way I have found to remove tomato skins. You cut a shallow "X" on the bottom of the tomato, just to score the skin, then plop them in boiling water only for 15-20 sec. You will start to see the skin crack and peel away where you cut. Then pull them out and dunk them in an ice bath. This shocks them so they don't continue to cook, and the skin almost slips off.

I don't do very well with spicy foods, so I was looking for a fresher chunky salsa. MD found this great recipe that we used. It was soooooo goooooood! Just what I was looking for.

INGREDIENTS:
Double (or triple) this recipe for a crowd.
1 1/2 c Roma tomatoes, chopped (seeds removed)
1/2 c cilantro, chopped
2 1/2 Tbls jalapeno pepper, finely diced (leave seeds in if you want spicier salsa)
1/2 red onion, finely diced
1/2 Tbls Kosher salt
2 Tbls fresh lime juice

(Credit to Trish from momontimeout.com who originally posted the recipe)


 In the picture below you can see the salsa in the white bowl, and all the diced tomatoes we still had left over in the green bowl. You could freeze the blanched tomatoes whole, but we planned on making homade marinara sauce for the Chicken Parmesan dinner that night. This was both of our first attempts ever at making marinara from scratch, but it turned out fantastic thanks to this recipe.

I was looking for a sweeter, meatless sauce that I could freeze. The original calls for some meat, but it was really good vegitarian due to all the fresh herbs. (I also threw in a bay leaf, shhhh!) We picked fresh oregano from my garden, but had to buy fresh basil since my potted basil was so wimpy this year.


Simple & Sweet Marinara Sauce
1 large yellow onion, finely diced
5 gloves of fresh garlic, minced
3 tablespoons of olive oil
1/2 cup decent red wine (Try using a cabernet savignon, merlot or shiraz for slight variations in flavor.)
28 oz can (or fresh) crushed tomatoes
6 oz can tomato paste
1-2 tablespoons brown sugar (use less for less sweet)
1 teaspoon Kosher salt
1 teaspoon fresh ground pepper
1/4 cup (at least) fresh basil, finely chopped
1/4 cup (at least) fresh oregano, finely chopped
3 tablespoons (at least) fresh parsley, finely chopped
1 tablespoon dried Italian herb blend
1 bay leaf while simmering
 Directions
  1. Heat a large pot or Dutch oven over medium heat. Add 3 Tbs of olive oil - OR- Brown meat of choice (lean ground beef, ground turkey or chicken, lean pork, or meatballs) and set aside. Drain out 70% of remaining fat but keep about 2-3 tablespoons in the pot.
  2. Add onions and saute for about 3 minutes. Add garlic and cook for another 2 minutes. 
  3. Pour in red wine and deglaze the pan, carefully scraping up any bits on the bottom of the pan with a wooden spoon. Allow the wine to reduce in volume by half by cooking for about 2-4 minutes. 
  4. Add tomatoes, tomato paste, brown sugar, salt, pepper, fresh herbs, and dried herbs. Stir to combine. 
  5. Reduce temperature to low or simmer. Add meat back into sauce if using. Cook for a minimum of 1 1/2 hours and as long as 8 hours. 

Makes about 4 cups of sauce. Freeze any extra sauce after it has cooled.
(Kudos to Jenna from freshfoodperspectives.typepad.com for the fabulous sauce!)

Even though I picked all the ripe tomatoes for those recipes, just a couple days later I was back out and picked even more along with the rest of the cucumbers. It's crazy how a garden can just keep producing!