Sunday, October 9, 2016

Camping and Running!

Dear Husband (DH) and I are pretty new when it comes to camping. Both of us camped a little bit with our families when we were young, but nothing since our ages have had two digits.

Thankfully, SisX and BroD have more recent experience and indulged us in a two-night camping trip last weekend to help show us the ropes.

We had such a nice little campsite-home for a couple days, but I wasn't able to get too many photos due to all the rain and drizzle during our stay.

I caught a few of us soaking in the sunshine while it was out and about. The boys were tossing around a football, while Eva lounged in the warming sand.


It was cold enough at night that Eva crawled into my sleeping bag and slept by my legs all night, but thanks to her we both stayed nice and cozy. It was quite a challenge getting Eva in the tent while trying to keep the sand out, but we managed well enough.

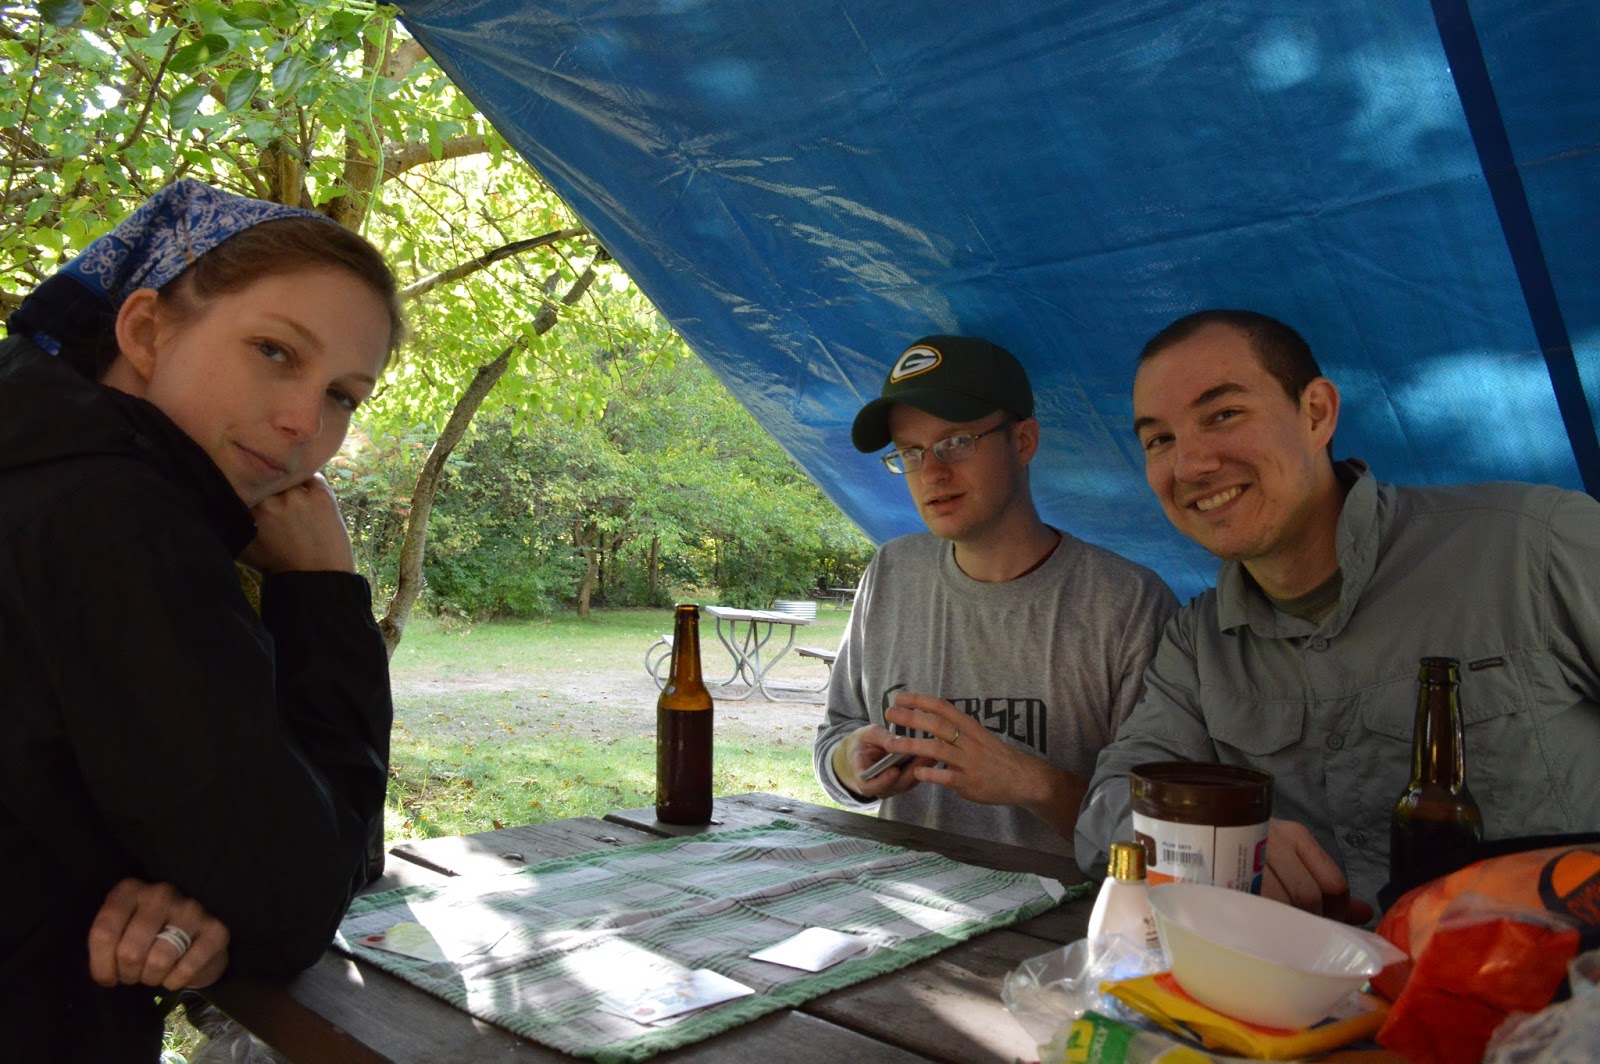
 We did get the chance to take a long hike over the dunes but due to the rain, the majority of our day time was spent huddling under our tarps, playing cards, and cooking amazing camping food.

How is it that all food tastes better when you have been camping? Not only did we have the traditional S'mores, SisX materialized breakfast "banana boats" which are bananas with peanut butter and chocolate chips, roasted in tin foil over the fire. It was a great, filling breakfast for a day of adventuring.


Of course one of the first things I did when we got back was bathe Eva right after unpacking the car. Naturally the very next day she found something nasty to roll in and earned herself a second bath in as many days... she didn't seem too remorseful. She was more interested in getting out so she could try to rub in the foul stench again.


We had those big adventures last weekend, but this weekend was also exciting; DH ran in his first 5K ever and rocked it!

There were over 500 people registered, and he had a lot of factors that could have messed with his time. He had never run with so many people before, he's not used to "trail running" compared to road running, he doesn't usually run outside when it is cool, and he had sprained a leg muscle a few weeks ago and hadn't run that distance in a while.


All that being said, he did AMAZING, beat his time goal, and finished in the top 10 for his age group!

I am so proud of him for going after it and completing this goal he has had for almost a year.
Way to go!


Sunday, September 25, 2016

Let There be Light... and Paint

Let there be light... entryway light!

Now that we have gotten some of the "required" house improvements complete (new roof, new furnace, landscape re-graded, and popcorn ceiling removal) we are now getting around to some more cosmetic fixes.

One of the big improvements is the entryway light. The existing one was a brass, 90's, builder grade fixture. None of those adjectives are a good thing. I was so excited to get it out of the house that I forgot to take a picture, so here is one from two years ago when we had the ceilings de-popcorned.

When looking for a new fixture there were a couple things I was looking for.
- We need a tall fixture, as the entryway is somewhere around 25-30 feet tall, but not very wide.
- We are slowly changing all the metals to a brushed nickle finish instead of a shiny brass.
- The house is more of a transitional style (between traditional and modern,) so something a little contemporary but not too modern.
- I'm not a fan of exposed light bulbs, so some sort of glass shade is preferred.

Here are the options I had narrowed it down to, and I included the height of each fixture as comparison. (Honestly anything would be an improvement!)

Option A: 29.25 inches

Product Image 1
Option B: 28 inches


Option C: 26 inches


Product Image 1
Option D: 28 inches


After much debating, going back and forth, we finally picked one. Both Dear Husband (DH) and I preferred the same one, and it just so happened to be the least expensive by a lot. Either we have cheap taste or we got a really good deal (I'm hoping it's the latter.) We chose... Option D.

Only after we chose it and as I was ordering it, I realized that the fixture is part of the same "design collection" as the lights we picked for our bathrooms!

Along with upgraded lighting we are also refreshing the paint, both inside and out. Talk about a game changer. Of all the improvements we have made, I really think this will make the biggest visual difference.

The existing color is a light beige/tan sandy color with dark brown trim. I wanted to change it to a warm charcoal gray with white trim. Here is a sneak peek of the colors we were picking from.

There are three different grays, and three different whites (which are impossible to distinguish in the photo.)

I will leave you in suspense as to which one we picked for the outside, but here is the color palette for the inside:


I know it probably looks pretty boring to most people, but I am afraid of color, so this is a big step for me. The bright blue and yellow in the upper right are for the front door and the craft room.

I have to keep reminding myself to be bold, color will not hurt me!

Saturday, September 10, 2016

Refreshing the Deck

Our deck needed some help. Serious help.
We had sealed it three years ago, but with the harsh winters and facing full South our deck sure gets a beating.

The biggest problem was that whoever installed it, put the boards too close together. When they get wet, the wood swelled, sealing tighter together, This caused a large six-foot puddle to form on the deck anytime it rained! Then of course in the winter it freezes into an ice rink. 

I could have just drilled some holes along the boards, but I would have had to put a hole every 6". I could have removed the boards and re-set them, but most of the screws were rusted and would strip as soon as torque was applied.

So what I decided to try was to rip cut (parallel to the wood grain) down each of the seams with a circular saw. I set the cut depth so it would cut all the way through the decking, but as little into the joists below as possible. It took a bit to get the hang of it and I veered off in a couple spots but for the most part they were in inconspicuous areas.

You can really see the difference in the picture to the left where the middle space has been sawed through.


It hadn't rained for quite a few days and the temperature was in the 80's, but as I was cutting some of the sawdust coming out was damp. Turns out the boards were so tight together that the center core of the wood would never dry out. This made the deck even more difficult to cut.


All of a sudden the deck looks a lot bigger when you are fighting for every inch. I had to take a break after every 4 or 5 boards because of the heat and my hands were starting to cramp up.

A few days later I got a couple blisters on the web of my hand from pushing the saw for so long.


That many long cuts really created quite a bit of sawdust. 
Dear Husband (DH) had the BRILLIANT idea to use the leaf blower and it worked like a charm! And here I was just going to use a broom like a caveman. 


Of course I was anxiously awaiting the next rain to see if my hard work made a difference.

Thankfully, it made a huge difference!
The individual boards still hold water since they are still warped, but no water is held between the boards.

This means everything dries up sooo much quicker!

We made sure to seal the deck once it was fully dry so it stays a bit protected for the next couple years.

A few weeks later, I noticed something funny... the gaps between the boards were larger than the width of the saw I used.

What happened is that as soon as the boards were able to FULLY dry out, all the way down to the core, there was no more water making them swell, so they shrunk down and the gaps widened. This just allows for even better airflow and quicker drying. Thankfully the gap isn't too big... just don't wear stilettos out there!


Saturday, August 13, 2016

A First Time For: Pickling!

More garlic scapes!
Remember that garlic scape pesto that was so good? Well even that didn't use all the scapes.

So I decided to try my hand at pickling for the very first time.

Have you ever had Dilly Beans? They are pickled green beans usually with dill, garlic, and sometimes a bit of red pepper flakes. They are salty and sour with some crunch and a bit of heat.

Well believe it or not, there is such a thing as Dilly Scapes!
It was my first time ever trying to pickle something, and I've only ever tasted Dilly Scapes once. Because of this, I made three slightly different versions to test out which one people like best. 

Pickling Solution:
- 2  1/2 cups water 
- 2  1/2 cups vinegar (or apple cider) 
- 1/4 cup pickling salt 

Jars (1/2 pint each):
- 1 sprig dill
- 1 pepper corn
- 1/8 tsp celery seed
- 10 (ish) granules Pickle Crisp (optional)
- Garlic scapes cut to length


Variations:
* 1 sprig oregano (only to 6)* (in the future, make this a 1/2 sprig)
*1 Tbs sugar in brine (only on second batch)*
*I didn't try adding anything spicy, but 1/8 teaspoon of red pepper flakes would spice things up!*


Directions:
- As always with canning things, make sure all the jars and lids are boiled and sterilized.
- Working a couple hot jars at a time, place the dill, pepper corns, celery seed, and (optional) Pickle Crisp in the bottom of each.
- Pack in the garlic scapes tightly in the jars, making sure there is 1/2 inch of headspace (space between the food and the lid)
- Pour in the hot pickling solution over the scapes leaving
- Pack in a few more scapes if they will fit
- Seal jars as usual, and process in boiling water for 10 minutes
(Here is a great tutorial for Dilly Beans which is almost exactly the same as Dilly Scapes)


Fyi, this is usually what the kitchen looks like whenever I am canning things: a creative disaster!

The only problem? You then have to wait 6 whole weeks for the flavors to infuse before you can sample the scapes.

Well it just so happens that Grandma's 90th birthday party was almost exactly six weeks later.

At the party, I nervously pried open three jars, one of each flavor. I had to taste each one to make sure I didn't serve anyone ruined or rancid food. To my pleasant surprise they all turned out!

There wasn't a huge difference between the three flavors (original, oregano, and pinch-o-sugar) unless you were comparing them in one tasting.


The general consensus seemed to be that the oregano dilly scapes edged out the other two variations. I think in future batches I will use a little less oregano and a little less celery seed.

The funniest part was that even the young kids on Dear Husband's (DH) side of the family LOVED them... but my parents didn't care for them. I guess you really have to love sour, pickled things!

Saturday, July 16, 2016

2016 Garlic: Pesto

This year's garlic harvest was the biggest yet.
Last year I had planted 2/3 of a garden bed.

Because I know that all the garlic will get eaten, and it is the lowest maintenance crops I have, I decided to go for it and planted an entire garden bed full of it.
(The garlic is in the front bed... the back one is all asparagus which didn't produce as well this year as I had hoped.)


What happens when you plant that much garlic? You get tons of garlic scapes! (Yay!)

I don't know what it is about garlic scapes, but I think they are beautiful. Something about the color, with the shape makes them feel so graceful. It helps that they smell amazing too.

You may remember that a few years ago I tried to make garlic scape pesto, but that only turned out so-so. This year I tried a different recipe and it was soooooo good! (I know I'm bias but even my foodie friend said so.)

I started with this garlic scape pesto recipe from "In the Kitchen & On the Road with Dorie Greenspan." The flavor was spot on, but it was STRONG!
I love garlic way more than the next person, but MAN! If you want to taste (and smell like) nothing but garlic for at least 12 hours, that is your recipe. Whew!

Instead of a thicker paste type pesto, I made mine into a much thinner bread-dip style pesto.


GARLIC SCAPE AND ALMOND PESTO
10 garlic scapes, finely chopped
1/2 cup finely grated Parmesan
1/3 cup slivered almonds (you could toast them lightly, if you'd like)
1+ cup olive oil (add more to dilute if desired)
1 tsp Sea salt

- Toast the almonds and throw them in a food processor (or blender) 
- Add the scapes, salt, and about half the olive oil
- Blend until smooth
- Add the Parmesan and the remaining olive oil
- Add more olive oil and salt to achieve the desired taste and consistency.


Dear Husband said that every time he eats crusty bread with the dip, he feels like he is in a fancy restaurant.

Above is the full recipe but because I had so many scapes, I cut the olive oil in half and froze it in an ice cube tray. That way I can let a cube thaw and add more olive oil for dip anytime.


We were also able to harvest a few other things from the garden including carrots and sugar snap peas, along with beets for the first time!
The beets were so sweet and tender, I will definitely have to plant more of those next year.

A few weeks later, over the Fourth of July, Mom helped me harvest the garlic bulbs from the garden. They now need to dry out and cure for a few weeks before trimming off the roots and leaves. A very rough estimate gives us around 100 heads of garlic.

I think I am going to be searching for some new recipes to use a lot of this and gift a lot more!


I'm thinking some roasted garlic....


Saturday, April 23, 2016

Continuing the Cleanup

Alright, back to reality after our glorious vacation.
You may remember that I was in the middle of A Bowl Full of Lemons 14 Week Challenge. It's a culling and cleaning challenge tackling a different room each week, hopefully making up for the fact that I don't have a full week to set aside for Spring cleaning.

Due to sickness, vacation, and well... life, I fell quite behind in the challenge. Like, fell-off-the-wagon behind. So, here I am trying to get back to it. The thing is, four out of the next five areas aren't really that bad.

First up: the Living Room
We probably spend most of our awake, home time in this room. It's usually pretty clean as it gets a once-over every week, and the majority of the furniture we use on a weekly basis. Ok, so there are some dog toys I need to pick up, and I continually have a stack of supplies on the coffee table for whatever my latest craft is. I did put those white baskets in the TV cupboard to hide video games and controllers in. I also removed a short bookshelf from the corner, as it was just holding decoration stuff. A quick pickup and this room is done.


Next: the Master Bedroom
If you remember, we actually re-did our master bedroom and bathroom just last year. (They still remain the only major rooms to be painted and "complete" from a decorating and design standpoint.) Well I am pleased to report that we have been able to maintain a clean and serene boudoir! I really do think the key is that we have very few items actually stored in this room. I did move the bookcase from the living room upstairs, as most reading occurs before trying to fall asleep. My goal is to end up with no more books than this shelf can neatly hold. (As we speak there are about 4 or 5 heavy boxes of books in the basement.) Once again, a quick pick-up/wipe-down was all this room needed. (Not counting the MONTHS we spend getting it to this state last year!)

And finally: Closets
The closets in the two spare rooms really aren't that bad. The one in the guest bedroom I try to keep mostly clear in case guests need hanging space or want to stash their suitcases out of the way.
I do store all the spare blankets up there as it seemed like a good place as any, and guests know where to find them if the room gets too cold.

The spare room closet holds our luggage, extra pillows, and the air mattress. Ok, so I know it doesn't look the neatest, but there really isn't much in there. I could nest the suitcases, but we use the two smaller sizes the most.

And the linen closet, which is impossible to get a good picture of because it is in a very narrow hallway. I did place a bunch of pillowcases, a duvet cover, and a shower curtain in the donate pile. I also moved the mismatching sheets to my painting drop-cloth supply. I have been torn about the towels. They are still in decent shape and I need a set for extra guests, but I really need to downgrade the brown ones to "puppy towels." Everybody has a stack of old towels, right? You know... the ones for drying off the dog, putting on the floor to mop up messes, throwing in the car for sand/mud... that's not just me, right?

Eventually I would like to get some baskets or something to make this feel a bit more organized, but let's face it; it's not my top priority.


Now that Spring is here and gardening season has started, it is only going to be more difficult for me to continue the 14 Week Challenge (which has technically already ended!) The next area is Bathrooms... wish me luck!


Monday, March 28, 2016

Hawaii Vacation

It has been almost two years, but Dear Husband (DH) and I finally got to take a get-away vacation! Since it had been a while, we decided to do it right.

Late January we were deciding between Rome and Hawaii.  When we determined that the best vacation time was going to be March, we felt that left too little time to plan an international trip. (We are both "type A" personalities who like to have a strategy and plan of attack.)

So Hawaii it was! It was an amazing trip, but with some frustrating travel both there and back. Between our three flights, we were delayed nine different times! The delays varied from 5 min, to 3 hours and 45 min.

We ended up getting a really good deal on renting a condo, but due to the delayed flights we got into Hawaii at around 11:30pm. Then after a looong day of travel, the door code they gave us didn't work. We were literally the width of a door away from our destination, and we couldn't get in. Thankfully I had an after-hours phone number to call and we were able to get in.

Since we arrived in the dead of night, we could smell and hear the ocean, but we had no idea how close we were. Then we woke up to this view:
Amazing!

Besides getting there and back, the rest of the trip was stunning. Because we have such pale skin, we spent the mornings running around doing activities, then go out to lunch, and return back to the condo to read and relax. We opened up the doors and windows so between the breeze, the sounds and smell of the ocean, and the view it really felt like we were outside, but under a shade tent.

The adventure on our first day was going out on a whale watching boat.
We were toward the end of the season, but we got to see quite a few. The best was when we saw a momma, her calf, and 3 or 4 males in pursuit. They went on a long 30-45 min chase and we followed watching their antics.


We hung out in Lahaina for the afternoon and it had to be one of my favorite places on the island.


Tuesday we drove the road to Hana. It was beautiful and a bit scary. We only had one really close call.


Wednesday we went snorkeling, and while the weather was rough so we didn't get to go to Molokini, we got to go to a couple of sites with diverse coral and fish. The best part was that it was DH's first time snorkeling and the amazed look on his face after he first stuck his face in the water was priceless.

Thursday we just explored around the island and did some casual shopping.


I think we saved the best for last. Our big splurge for the trip was a helicopter ride around Haleakala (the big volcano) and Hana. The scenes were astounding. It made me realize what a stunning, harsh beauty Hawaii is.


After the flight, we treated ourselves to an incredible meal with a fabulous view.


 All in all it was a great trip, and just what I needed: a bit of adventure, and a lot of relaxing.
It reminded me that I often get caught up in the day-to-day, and I need to slow down a bit and live in the Aloha spirit.