Tuesday, March 31, 2015

Beer! Part 1

Hey everyone, welcome to the first spinoff episode of Vermillion Home Adventures, brought to you by Dear Husband (DH). For my birthday this year, the wife got me a beginner’s homebrew kit. Anyone who knows my family knows that homebrewing is in my blood (sometimes literally, hey-ooh), and I’ve been curious about trying it out for a while now. I made my first batch a few weeks ago, a pretty tasty oatmeal stout. I’m ready to start my second batch, and thought it would make for a good blog entry.


First step -- sanitize! Yeah this isn’t the fun part, but it’s pretty important. Soak all your equipment in a solution of 1 shot bleach per 3 gallons of water for about 20 minutes, and then let them air dry. There’s a lot of equipment to sanitize, so Dear Wife (DW) pointed out that it may be easiest to soak everything in the kitchen sink, but that I should probably scrub it out first. I mean, I love you and agree with you, honey, but don’t think you snuck that one past me.

Make Some Beer!
Now that you’re ready to start cooking, you’re going to add the beer-making mix (a magical bag of beer stuff -- all the grains you’re going to extract sugars from) to 2 quarts of heated water and keep it at 150 degrees for 60 minutes. This oatmeal-looking-stuff is the mash. You need to keep it at a steady temperature, so you need to occupy the time somehow without wandering too far off. I decided to pass the time by using a little toy we picked up recently:
Blue shells, I swear...

Once the 60 minutes is up, you’re going to heat everything to 170 degrees and move it to a strainer, collecting the wort (future-beer-liquid) in a big pot. The next step is to pour 4 quarts of 170-degree water over the mash to give you more wort. Put the wort through the strainer once more to collect more sugars from the mash. You’ll end up with more than a gallon of wort, but some of it will evaporate in the next step.


You’re going to heat the wort to a low boil to start off the next step. The liquid needs to boil for 60 minutes. For this particular recipe, you need to add half of your palisade hops right away, half of the remaining hops 45 minutes into the boil, and the remaining hops go in at the end of the boil. Some recipes will call for different hops to be added at different times, but this one only calls for one variety.


The wort looks a little different when it cools down
After the boil, you need to cool the wort down to 70 degrees, so fill up your nice clean sink with ice water and set the pot inside. The cooled wort then needs to be added to a one-gallon jug, which is where it will be spending the next two weeks. It’s important to pour the wort through a strainer. Yeast needs oxygen, and the strainer will help aerate the liquid.

Spare bathroom - the perfect place to keep the light away
Time to add the last ingredient, the yeast. If you taste the wort at this point, it won’t taste like beer, but it will instead be surprisingly sweet. Yeast reacts with the sugars to create alcohol, that’s what happens during the fermentation process. So add the yeast, shake the jug a bit to “wake up” the yeast, and add the screw cap. The byproduct of the fermentation process is carbon dioxide, so you’re going to connect one end of the tubing to the jug, and set the other end in a bowl of sanitized water.

The fermentation process will last two weeks, and there’s only two things to do in the meantime:


1) The beer will bubble quite a bit during the first couple days, but once it settles down you need to replace the tube with the airlock.

A watched beer batch never ferments, puppy
2) Collect empty bottles that you can use in two weeks when you’re ready to bottle the beer. I find that full bottles are a lot easier to come by than empty bottles, but emptying them can take some effort.
Better start prepping the empty bottles right away. Cheers.


Sunday, March 29, 2015

Biggest Mis-Adventure Yet

Just like everyone else, my life is far from perfect.

In the subtitle of this blog, you will see that I mention sharing mis-adventures.
Most of my mis-adventures (mistakes) are frequent, but small. A hole drilled in the wrong place, impatient paint drips, or green beans failing to sprout. Most of these are recoverable or small lessons learned.

But not this time. This time, I messed up BIG.

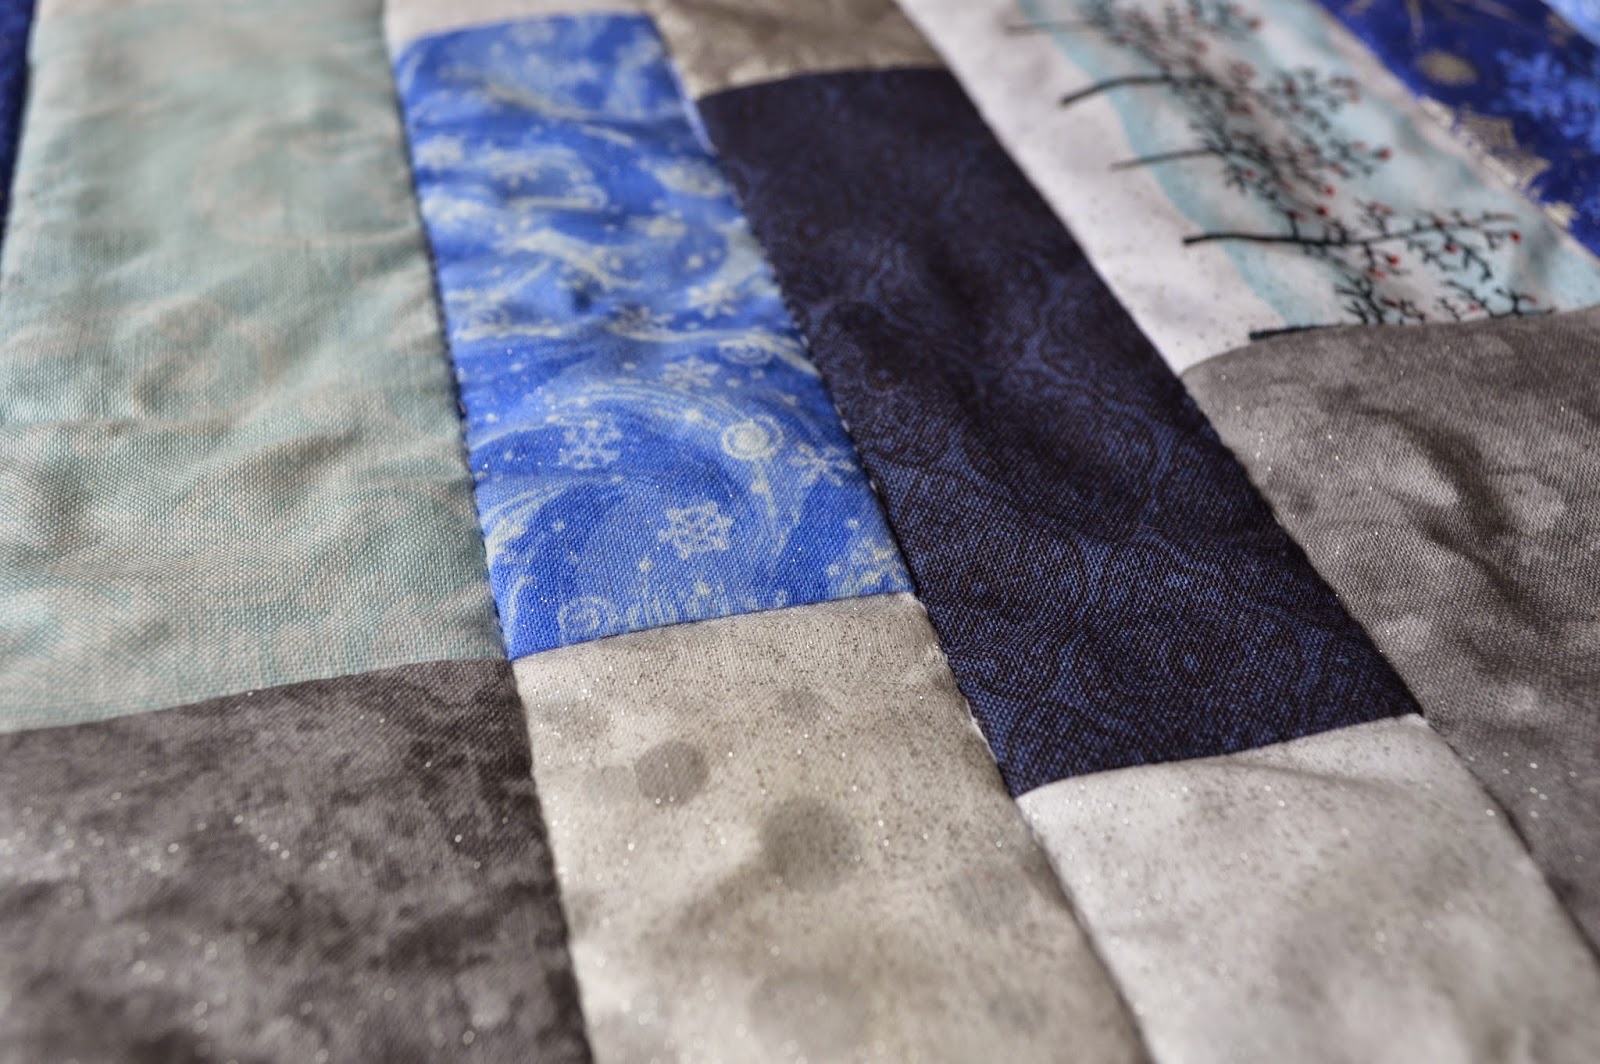
I had been wanting to try my hand at quilting for quite a while. Last October (yes, October) I started taking lesson. We decided to start with something small; a table-runner.
I knew it was going to take me forever, so I didn't bother making a holiday themed one. It also means I didn't take pictures along the way, as it is such an involved process. (Sorry!)


Life, as usual, took over and the project got put aside.
With almost every project there comes a point of no-turning-back. You can't un-glue paper, you can't un-drill a hole, and you can't un-cut fabric. So of course when it came to actually cutting the fabric, I stalled and procrastinated. For a few months.

After I built the courage, I finally cut the strips and started piecing fabric together. I learned A LOT along the way... cutting accurately is crucial, color shade makes a bigger difference than color hue, and tolerances add up (just to name a few.)

After hours and hours of pinning, sewing, and ironing, I was finally in the home stretch. It was pieced, quilted, and the binding sewed on. I even sewed the mitered corners together by hand (see right). I put it in the washer on "hand wash" in cold water, then pulled it out to iron it one final time.

I was so close.
All I had to do was iron it, and I was DONE!
And that's where I ruined it. On the very last step.

 Rather than waiting for it to dry, and then iron it. I figured ironing it would help it dry. WRONG. Oh so wrong. I'm sure real quilters are already cringing, but I was new at this and didn't know any better.

I was distractedly pressing the runner for the final time while watching TV, when I look down... and it's BLUE.
The blue colored backing has bled through the front, staining the lighter colored top.

My stomach drops, I feel light-headed, and a cold panicked sweat breaks out on my brow.
I have worked HOURS, DAYS, MONTHS on this one piece. All for it to be ruined at the very last step.
I had even ironed it previously, and this didn't happen! But I just had to iron it while damp...

Adding insult to injury, the blue dye stained my iron and my newly crafted TV tray - turned ironing board. (Eva inspects the damage, which is tough to see in pictures.)

My shock quickly turned to anger. The entire core of my being was angry. It radiated from my heart to the pit of my stomach. I had worked so hard, and I was so close to finishing.


Eventually I moved on to sadness. I was so upset, I will fully admit that my eyes watered and a tear or two slid down my cheek.
I'm sure anyone who has had a hand-made project ruined can understand.

I had given up, and all I wanted to do was donate the table runner. I never wanted to see it again, but maybe I should keep it and put it on the table as a twisted reminder of what NOT to do.

The next day I half-heartedly looked online to see if there were any suggestions, not really expecting anything. Some sites suggested non-chlorine bleach (Oxi Clean). I figured there was nothing left to lose. Literally.
I mixed some in the tub, and threw in the cursed table-runner without hope or expectation.

Hours later I removed the still-stained runner, however the water in the tub was quite blue. Perhaps this will help to keep it from staining more in the future.
A second soaking later, and the table runner is still stained, blue bleeding through the seams. I do think the Oxi Clean helped, but it was just past the point of full redemption.


The only shining light in this story is that the blue dye on the iron easily wiped off with just some white vinegar and a paper towel.


I feel silly that this little thing is what constitutes as a disaster. While I am still sad and frustrated, I am also so thankful that I don't have anything truly tragic in my life to worry and stress over. How blessed am I?!

*Update* after hours and hours of multiple soakings in Oxi Clean, the runner does look MUCH better. Not perfect by any means, but definitley usable.


Wednesday, March 25, 2015

Playing House: Curtains!

 You know who has curtains?    Grown-ups.

Grown-ups have curtains.  So it was really weird when I finished this project, looked at the room, and it looked like a grown-up's house.
(When in reality, it feels like I'm just "playing house" like any other little kid.)

I also found out that curtains and curtain rods are unnecessarily expensive!
One curtain panel is $25-$30, and of course you usually need two. Then the curtain rod is another $25-$30, so for EACH window, you are looking at $75-$100.

I wasn't seeing any patterns I liked, and all of them were too short for floor-ceiling curtains. So I decided to make my own.
I didn't need anything fancy, and fabric is expensive so I just bought 10 yards of white muslin (basic bulk cotton fabric.) After a 50% off coupon, it was only $50 for four curtain panels.

Do you know how difficult it is to wash, dry, and iron 10 yards of fabric? Imagine 4 king-sized sheets all sewn together and twisting around in your dryer, then trying to iron them!

The actual sewing part was pretty easy. I just cut the fabric to the right lengths, folded over the sides twice, ironed and sewed a straight line. I did a similar process for the top, but tucked under strips of ribbon to be used as "tabs" for the curtain rod to thread through.


Speaking of curtain rods, an inexpensive solution is to use electrical conduit. These sturdy poles are made of aluminum (light, but strong) and come in 10 foot lengths. (If you remember, I use them for tomato cages and supporting the hops.)

They were already silver, but it also had some printing and an odd visual texture. A quick spray paint coat of primer and "brushed nickel" and they matched perfectly. I was torn if painting them would be worth it, but after they were up it really did make a huge difference. I am so glad I did! 

The only problem with using electrical conduit, is it leaves an open end. No fancy finial.
I was looking for solutions and in Pier1 I ran across some fancy drawer pulls on clearance (less than $3 each!). Snatching them up, I knew I could make them work somehow. 

Initially I was just going to glue them on, but then you wouldn't be able to remove them if the curtains ever needed to be taken down. Sooo I had to find another solution. It took me quite a while to figure this one out, but I'm pretty proud of it. Wine corks!

Yep! Here, you can see three wine corks (I only needed three finials because one curtain was right up against a wall in the corner.) I used the artificial corks made out of some sort of foam so they wouldn't crumble like traditional cork. I drilled a hole in the middle, enough for the finial to screw into snug.


Turns out the corks were too big to fit into the end of the pipe, so I took a razor blade and whittled them down so they fit perfectly!

After that was complete, I took some basic curtain rod hangers and installed the rod about 6-8" above and 10-12" outside the window frame. (It's supposed to make the windows look taller and wider.)

Once hung, I marked the curtain length and hemmed the bottom.
FYI, I learned the hard way that you should mark and hem each panel individually rather than "trusting" they are the same length.

Here's the bedroom window:


And a before-and-after of the bathroom!
(I think the window looks bigger, don't you?)


On a completely separate topic, Dear Husband (DH) made his first batch of home-brewed beer! It was an Oatmeal Stout that turned out really good! I might just be able to convince him to be a guest blogger as he brews his second batch.


Sunday, March 8, 2015

Easy Peasy Baby Blankie

Let me start with this: Nope, I'm NOT pregnant... I'm not ready for that chaos.

But I did recently make two baby blankets for a couple of my coworkers. Since I am still new to sewing, I followed this great tutorial here, which was super simple.

All I needed was about 40 inches of both a flannel print (nice and soft) and this new-fangled "minky" fabric, popular for baby items. It is a synthetic velure (velvet-like) fabric made from polyester (don't iron... it WILL melt.)  It is a bit slick, and quite stretchy making it tricky to sew with sometimes, but thankfully a baby blanket doesn't need to be exact. The soft-ness is worth it!

One coworker was having a baby shower for her second girl that is on-the-way.
Another friend is working with a foster-to-adopt program and just got a new 12 month old addition to their family. Regardless if he ends up being a permenant addition or not, every child needs a special blanket of their own.

The process is pretty simple:
1. Line up the fabrics, right-sides together
2. Trim the edges to create the size you want
3. Embellish if desired (I will get to this in a bit)
4. Sew around the edges (1/2 inch seam), leaving a 4-6 inch gap
5. Turn blanket inside out through the gap you left
6. Sew around edges (1/4 inch seam)
7. Admire your work!

Here are some of the "extra" things I did to make it special:

Instead of square corners, I wanted to make them rounded. I took a regular ol' kitchen bowl and cut around that as a template. Before flipping right-side-out, I cut out some of the extra seam fabric around the corners so it didn't bunch up and distort the corners. Just be careful not to cut your seam!
I appliqued (sewed on top) the first name initial. How? I ironed on "double-sided fusable interfacing" to the letter fabric, then cut out the letter (make sure it is right-side-up so your letter isn't backward!) Then I ironed it onto the blanket where I wanted it. (Don't melt the minky fabric!) To make sure it stays long-term you want to sew down the edges of the letter. You could hand-sew, but I messed around with the zig-zag stitch width and length until I found a look that I liked.

I did pre-wash the fabric, but that is totally optional. I don't know if the minky fabric was damaged before or got snagged in the wash, but I pulled it out and it had a small hole in it. Crud!

So I mended the hole by hand, then applied a little heart patch on the right-side of the fabric (in the same manner as the initial) and hand sewed the edges since it was so small. Now it just looks like a feature!
Whew. Don't tell!

 It turned out really cute, and now I kind of want one now to snuggle up in. Eva certainly approved.

 Looks like the new owner approves too!


Sunday, March 1, 2015

Hot Irons and Cold Ice

Hot Irons:

This next project I worked on was so quick, I forgot to take pictures along the way.
What is it? A tray-table ironing board!

I have a little secret... I only have 3 shirts that need ironing. That's it. Nothing else.

Yes, I know how to iron (thanks, Mom!) and while I don't love it, I don't mind it either. It's just that the result is not worth the time and effort.

The biggest pain for me is trying to set up our cheapo half-broken ironing board. I know I could just get a better one, but it hardly ever gets used! 

As I am interested in trying my hand at a bit more sewing, I needed something small and convenient.  
I followed this tutorial from American Quilting which was super simple.

They used "insulated batting" but I couldn't find that. So to protect the wood and batting, I bought some "ironing board cover fabric." (I didn't know that existed until this project!)

So I placed the decorative fabric face-down on the floor, then the insulating fabric, then the batting, then placed the tray upsideown on top of all that. 
 
A little bit of folding, tucking, and stapeling later and it was complete!


I might have a bit too much batting because the iron isn't very stable when standing on it, but that is just a lesson learned.


So what about the "Cold as Ice?"

A few weekends ago, our little downtown hosted their annual ice-fest and brought in some AMAZING ice sculptors. That was the one warm weekend we have had, and many of the sculptures suffered but I got some great shots!