Saturday, July 16, 2016

2016 Garlic: Pesto

This year's garlic harvest was the biggest yet.
Last year I had planted 2/3 of a garden bed.

Because I know that all the garlic will get eaten, and it is the lowest maintenance crops I have, I decided to go for it and planted an entire garden bed full of it.
(The garlic is in the front bed... the back one is all asparagus which didn't produce as well this year as I had hoped.)


What happens when you plant that much garlic? You get tons of garlic scapes! (Yay!)

I don't know what it is about garlic scapes, but I think they are beautiful. Something about the color, with the shape makes them feel so graceful. It helps that they smell amazing too.

You may remember that a few years ago I tried to make garlic scape pesto, but that only turned out so-so. This year I tried a different recipe and it was soooooo good! (I know I'm bias but even my foodie friend said so.)

I started with this garlic scape pesto recipe from "In the Kitchen & On the Road with Dorie Greenspan." The flavor was spot on, but it was STRONG!
I love garlic way more than the next person, but MAN! If you want to taste (and smell like) nothing but garlic for at least 12 hours, that is your recipe. Whew!

Instead of a thicker paste type pesto, I made mine into a much thinner bread-dip style pesto.


GARLIC SCAPE AND ALMOND PESTO
10 garlic scapes, finely chopped
1/2 cup finely grated Parmesan
1/3 cup slivered almonds (you could toast them lightly, if you'd like)
1+ cup olive oil (add more to dilute if desired)
1 tsp Sea salt

- Toast the almonds and throw them in a food processor (or blender) 
- Add the scapes, salt, and about half the olive oil
- Blend until smooth
- Add the Parmesan and the remaining olive oil
- Add more olive oil and salt to achieve the desired taste and consistency.


Dear Husband said that every time he eats crusty bread with the dip, he feels like he is in a fancy restaurant.

Above is the full recipe but because I had so many scapes, I cut the olive oil in half and froze it in an ice cube tray. That way I can let a cube thaw and add more olive oil for dip anytime.
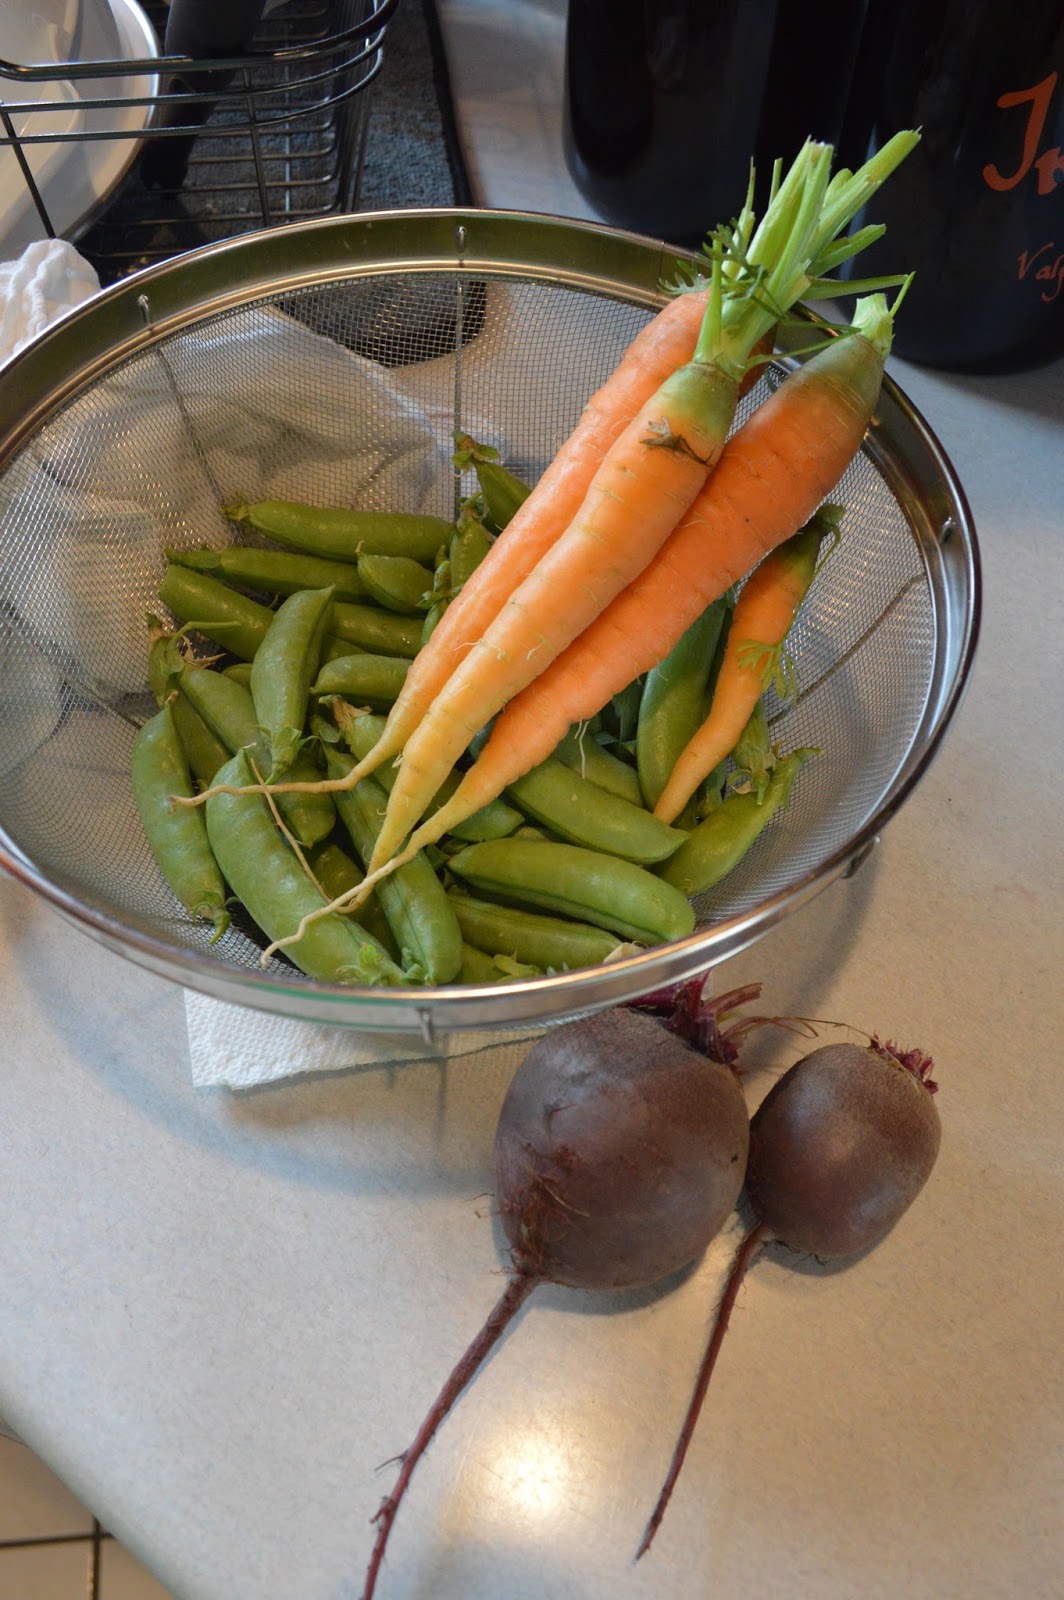


We were also able to harvest a few other things from the garden including carrots and sugar snap peas, along with beets for the first time!
The beets were so sweet and tender, I will definitely have to plant more of those next year.

A few weeks later, over the Fourth of July, Mom helped me harvest the garlic bulbs from the garden. They now need to dry out and cure for a few weeks before trimming off the roots and leaves. A very rough estimate gives us around 100 heads of garlic.

I think I am going to be searching for some new recipes to use a lot of this and gift a lot more!


I'm thinking some roasted garlic....


Saturday, April 23, 2016

Continuing the Cleanup

Alright, back to reality after our glorious vacation.
You may remember that I was in the middle of A Bowl Full of Lemons 14 Week Challenge. It's a culling and cleaning challenge tackling a different room each week, hopefully making up for the fact that I don't have a full week to set aside for Spring cleaning.

Due to sickness, vacation, and well... life, I fell quite behind in the challenge. Like, fell-off-the-wagon behind. So, here I am trying to get back to it. The thing is, four out of the next five areas aren't really that bad.

First up: the Living Room
We probably spend most of our awake, home time in this room. It's usually pretty clean as it gets a once-over every week, and the majority of the furniture we use on a weekly basis. Ok, so there are some dog toys I need to pick up, and I continually have a stack of supplies on the coffee table for whatever my latest craft is. I did put those white baskets in the TV cupboard to hide video games and controllers in. I also removed a short bookshelf from the corner, as it was just holding decoration stuff. A quick pickup and this room is done.


Next: the Master Bedroom
If you remember, we actually re-did our master bedroom and bathroom just last year. (They still remain the only major rooms to be painted and "complete" from a decorating and design standpoint.) Well I am pleased to report that we have been able to maintain a clean and serene boudoir! I really do think the key is that we have very few items actually stored in this room. I did move the bookcase from the living room upstairs, as most reading occurs before trying to fall asleep. My goal is to end up with no more books than this shelf can neatly hold. (As we speak there are about 4 or 5 heavy boxes of books in the basement.) Once again, a quick pick-up/wipe-down was all this room needed. (Not counting the MONTHS we spend getting it to this state last year!)

And finally: Closets
The closets in the two spare rooms really aren't that bad. The one in the guest bedroom I try to keep mostly clear in case guests need hanging space or want to stash their suitcases out of the way.
I do store all the spare blankets up there as it seemed like a good place as any, and guests know where to find them if the room gets too cold.

The spare room closet holds our luggage, extra pillows, and the air mattress. Ok, so I know it doesn't look the neatest, but there really isn't much in there. I could nest the suitcases, but we use the two smaller sizes the most.

And the linen closet, which is impossible to get a good picture of because it is in a very narrow hallway. I did place a bunch of pillowcases, a duvet cover, and a shower curtain in the donate pile. I also moved the mismatching sheets to my painting drop-cloth supply. I have been torn about the towels. They are still in decent shape and I need a set for extra guests, but I really need to downgrade the brown ones to "puppy towels." Everybody has a stack of old towels, right? You know... the ones for drying off the dog, putting on the floor to mop up messes, throwing in the car for sand/mud... that's not just me, right?

Eventually I would like to get some baskets or something to make this feel a bit more organized, but let's face it; it's not my top priority.


Now that Spring is here and gardening season has started, it is only going to be more difficult for me to continue the 14 Week Challenge (which has technically already ended!) The next area is Bathrooms... wish me luck!


Monday, March 28, 2016

Hawaii Vacation

It has been almost two years, but Dear Husband (DH) and I finally got to take a get-away vacation! Since it had been a while, we decided to do it right.

Late January we were deciding between Rome and Hawaii.  When we determined that the best vacation time was going to be March, we felt that left too little time to plan an international trip. (We are both "type A" personalities who like to have a strategy and plan of attack.)

So Hawaii it was! It was an amazing trip, but with some frustrating travel both there and back. Between our three flights, we were delayed nine different times! The delays varied from 5 min, to 3 hours and 45 min.

We ended up getting a really good deal on renting a condo, but due to the delayed flights we got into Hawaii at around 11:30pm. Then after a looong day of travel, the door code they gave us didn't work. We were literally the width of a door away from our destination, and we couldn't get in. Thankfully I had an after-hours phone number to call and we were able to get in.

Since we arrived in the dead of night, we could smell and hear the ocean, but we had no idea how close we were. Then we woke up to this view:
Amazing!

Besides getting there and back, the rest of the trip was stunning. Because we have such pale skin, we spent the mornings running around doing activities, then go out to lunch, and return back to the condo to read and relax. We opened up the doors and windows so between the breeze, the sounds and smell of the ocean, and the view it really felt like we were outside, but under a shade tent.

The adventure on our first day was going out on a whale watching boat.
We were toward the end of the season, but we got to see quite a few. The best was when we saw a momma, her calf, and 3 or 4 males in pursuit. They went on a long 30-45 min chase and we followed watching their antics.


We hung out in Lahaina for the afternoon and it had to be one of my favorite places on the island.


Tuesday we drove the road to Hana. It was beautiful and a bit scary. We only had one really close call.


Wednesday we went snorkeling, and while the weather was rough so we didn't get to go to Molokini, we got to go to a couple of sites with diverse coral and fish. The best part was that it was DH's first time snorkeling and the amazed look on his face after he first stuck his face in the water was priceless.

Thursday we just explored around the island and did some casual shopping.


I think we saved the best for last. Our big splurge for the trip was a helicopter ride around Haleakala (the big volcano) and Hana. The scenes were astounding. It made me realize what a stunning, harsh beauty Hawaii is.


After the flight, we treated ourselves to an incredible meal with a fabulous view.


 All in all it was a great trip, and just what I needed: a bit of adventure, and a lot of relaxing.
It reminded me that I often get caught up in the day-to-day, and I need to slow down a bit and live in the Aloha spirit.


Sunday, February 28, 2016

Power Outage and Cowboy Coffee

This past Thursday we had a big snow storm come through, and while the amount of snow wasn't too bad it was HEAVY snow.

Unfortunately, this caused a power line or transformer to fail and our power was out for almost 24 hours. It doesn't sound like a big deal, but during Winter it is always tough losing power. It is tougher when all your appliances are electric and you are unable to cook or bake!

Our furnace is gas, but electrically powered, so of course that was out too. Yes, it got pretty cold (down to 55 degrees F) but remember how I converted the fireplace into wood-burning? It sure came in handy! We were able to keep nice and toasty

I even made cowboy coffee... well almost. True cowboy coffee is basically just boiled water with grounds thrown in. I made more of a "coffee tea bag" where I tied up the coffee in a filter to make a bundle and steeped in the mugs. It was a bit weak, but hey, it was coffee.

Lunch and dinner were also heated up in the fireplace. Thank goodness for a stocked freezer and canned goods.

Dessert was also served over the fire, but roasted marshmallows and open fire just go together!

Thankfully, before the lights went out I got one small project done.


A friend was looking for some donations for a silent auction and as long as I was making birthday cards, I thought I would make up some stationary to donate.

To the right is a set of 5 cards with a spring theme. I put on a cute little tag and stamped a fern leaf and a dragonfly on each of the envelopes.


Here is a set of 8 cards that could be used for anything from invitations, to thank you notes, to personal correspondence.
A simple strawberry is printed and embossed on the card, while a watermelon decorates the envelopes.


This last set of 6 is a favorite of the guys. (I guess the other ones were too girly for them.) They have an "antiqued" look with a golden key stamp at the top combined with some faux travel stamps to finish the look.

Hopefully they will raise a little bit for the preschool which is the beneficiary of the silent auction.

Sunday, February 21, 2016

Spring Cleaning the Pantry (and more)

In my last blog post I talked about how setting aside a whole week for Spring Cleaning is impractical for a full-time working couple. I also mentioned that I am following along with A Bowl Full of Lemons 14 week organizing challenge.

Each week you are supposed to tackle a different area of the house. Well the very first room, the kitchen, took me four weeks to complete. I'm going to make the excuse that it is the toughest room!
Well I finally got to move on the the next area... the pantry. I didn't move far, but at least this one was a small space.

Well, I thought it was a small space, but look below to see how much stuff fits in there! This is after I threw out the 5-6 expired items. Because of the small pantry and only two people in the house, I can usually keep tabs on what is in the pantry and toss old items.

Figures that as soon as I got the kitchen cleared and cleaned, it gets all cluttered with pantry goods. You can see I did have my little helper, Eva, as always. However, her time was split between checking on me and snoozing in the sun spots.


The thing that has always bothered me with this pantry is the instability of the shelves.  Only two little plastic clips are holding each shelf in the back. Too many cans on one shelf and it would start to "bow" and become bouncy. Every time I placed a home-canned jam or sauce on the shelf, my insides would cringe as I envisioned the shelf falling, glass shattering, and all my hard work and love splattering over the tile floor.


 No more! While permanent shelves would be nice, I like being able to "see through" the shelves so I can see everything in the back. So using scrap wood I had on hand, I build shelf supports and screwed them into the studs on the back wall of the pantry. While the shelves still bend a bit under a heavy load, they are more stable, and my heart doesn't flutter every time I stack apple butter.

It was pretty easy. I just measured and cut the wood to length, used a studfinder to mark where screws should go, pre-drilled holes and screwed the boards in place.

The funny thing? I painted some screws white so they would blend in a bit better. However, when I was installing them I found that longer screws worked better on the ends. Well, after that photo was taken I did a short-cut cheat. *Shh don't tell!*

To hide the gray screws, I actually used white-out to "paint" them so they would blend in better! Normally that is a bad idea because it won't match perfectly, but you really don't see these screws much, and I didn't want to spray paint them and ruin the wall paint. Silly, I know but sometimes it works.

I also added yellow plastic place-mats to two if the shelves. They really help to keep the cans from tipping over.

It still looks a bit cluttered, but most of that is due to the leftover chips from our Superbowl party. Dear Husband (DH) told me I was buying way too many chips but I wasn't convinced. Needless to say, he was right.

Now, week three (dining room) and week four (launch pad) were pretty easy for me so I was able to clear and clean them more quickly.

Our dining room is on the half of the house we don't use as much. I still had a large pile of items for donation that I culled out of the kitchen, so I really only had to put things away where they belonged
I still need to paint and put up curtains, but I am STILL working on removing the wallpaper paste. (Worst. Project. Ever.)

The "launch pad" is the area where you drop all your stuff when you enter your house. Some people have a mud room, others just have a few hooks on the wall. In our case we have two areas; one by the garage door for us, and one by the front door visitors.

This was was a closet I converted into a mini mudroom and the first space I redecorated when we moved in. Removing the bi-fold door made it much easier to use, but it is still very difficult to photograph due to the tight space. To the right is the view when you walk in from the garage. Coats, shoes, and mail goes there.

On the other inside wall you can see where we hang our keys and sunglasses.
I also see a peek-a-boo puppy who is spying on me!


Here is the one by the front door where guests can hang up their coats and sit down to take off their shoes. (Don't mind the ladder, that is for removing wallpaper paste. Ugh.)